
Worked exampleExported from Calvance
Aquarium Water & Bucket Fills
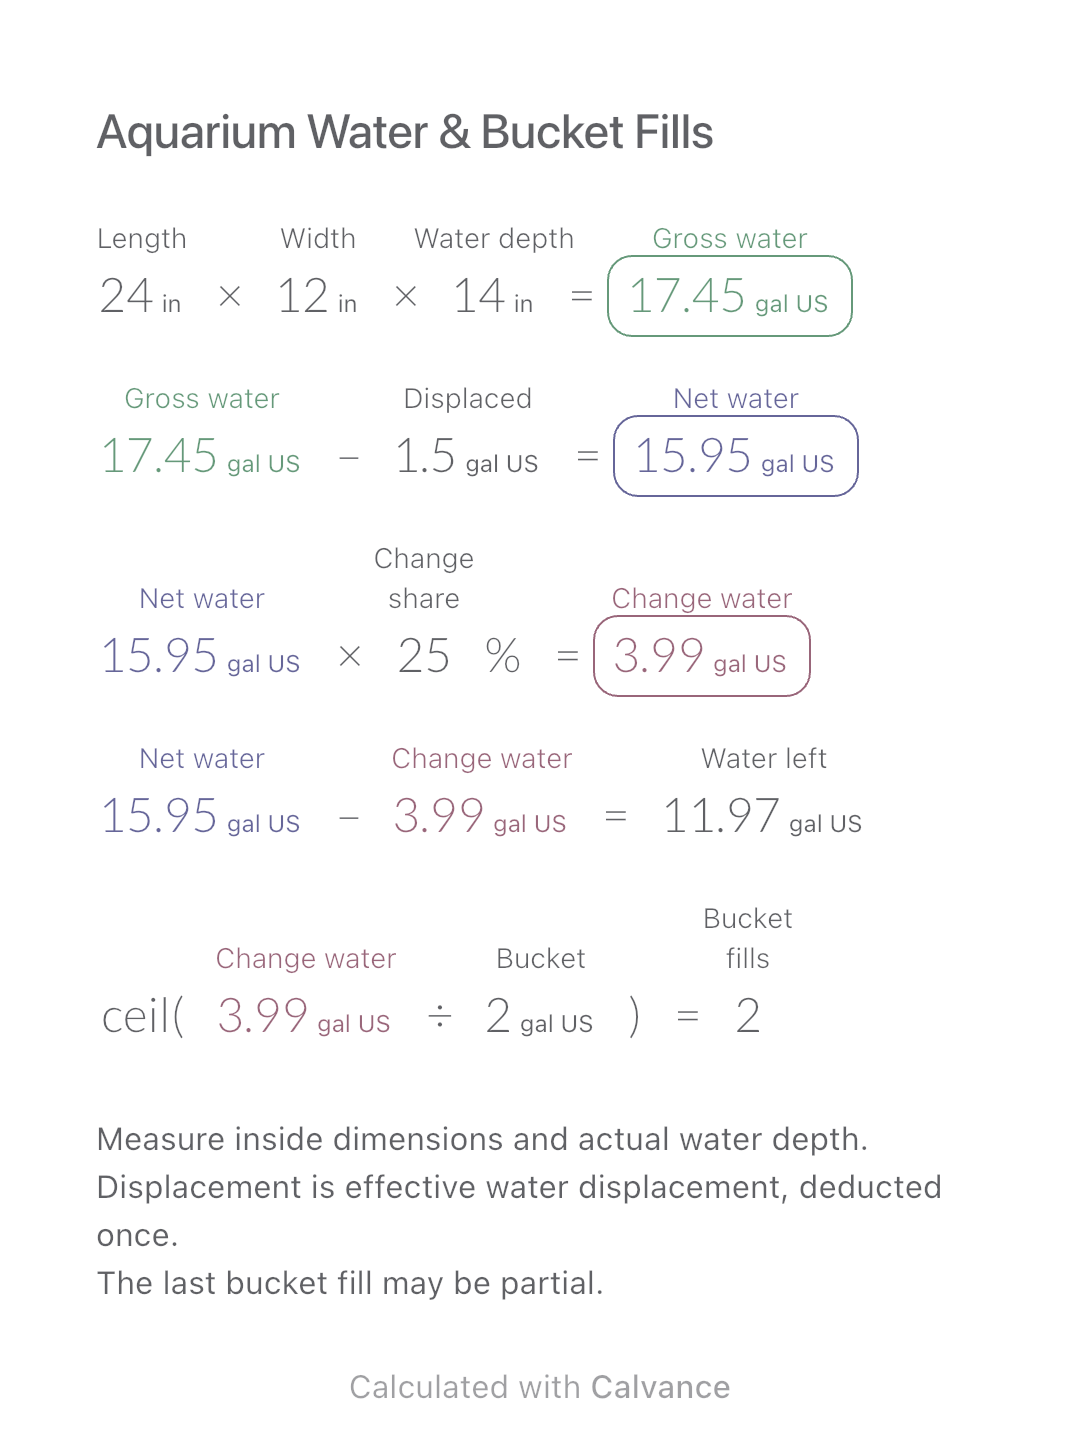
Estimate rectangular aquarium water volume, choose a water-change share and work out how many bucket fills to prepare.
View template and methodCompare two uniform sticker orientations and the sheets needed, including bleed, extra gaps and a fixed number of spare sheets.
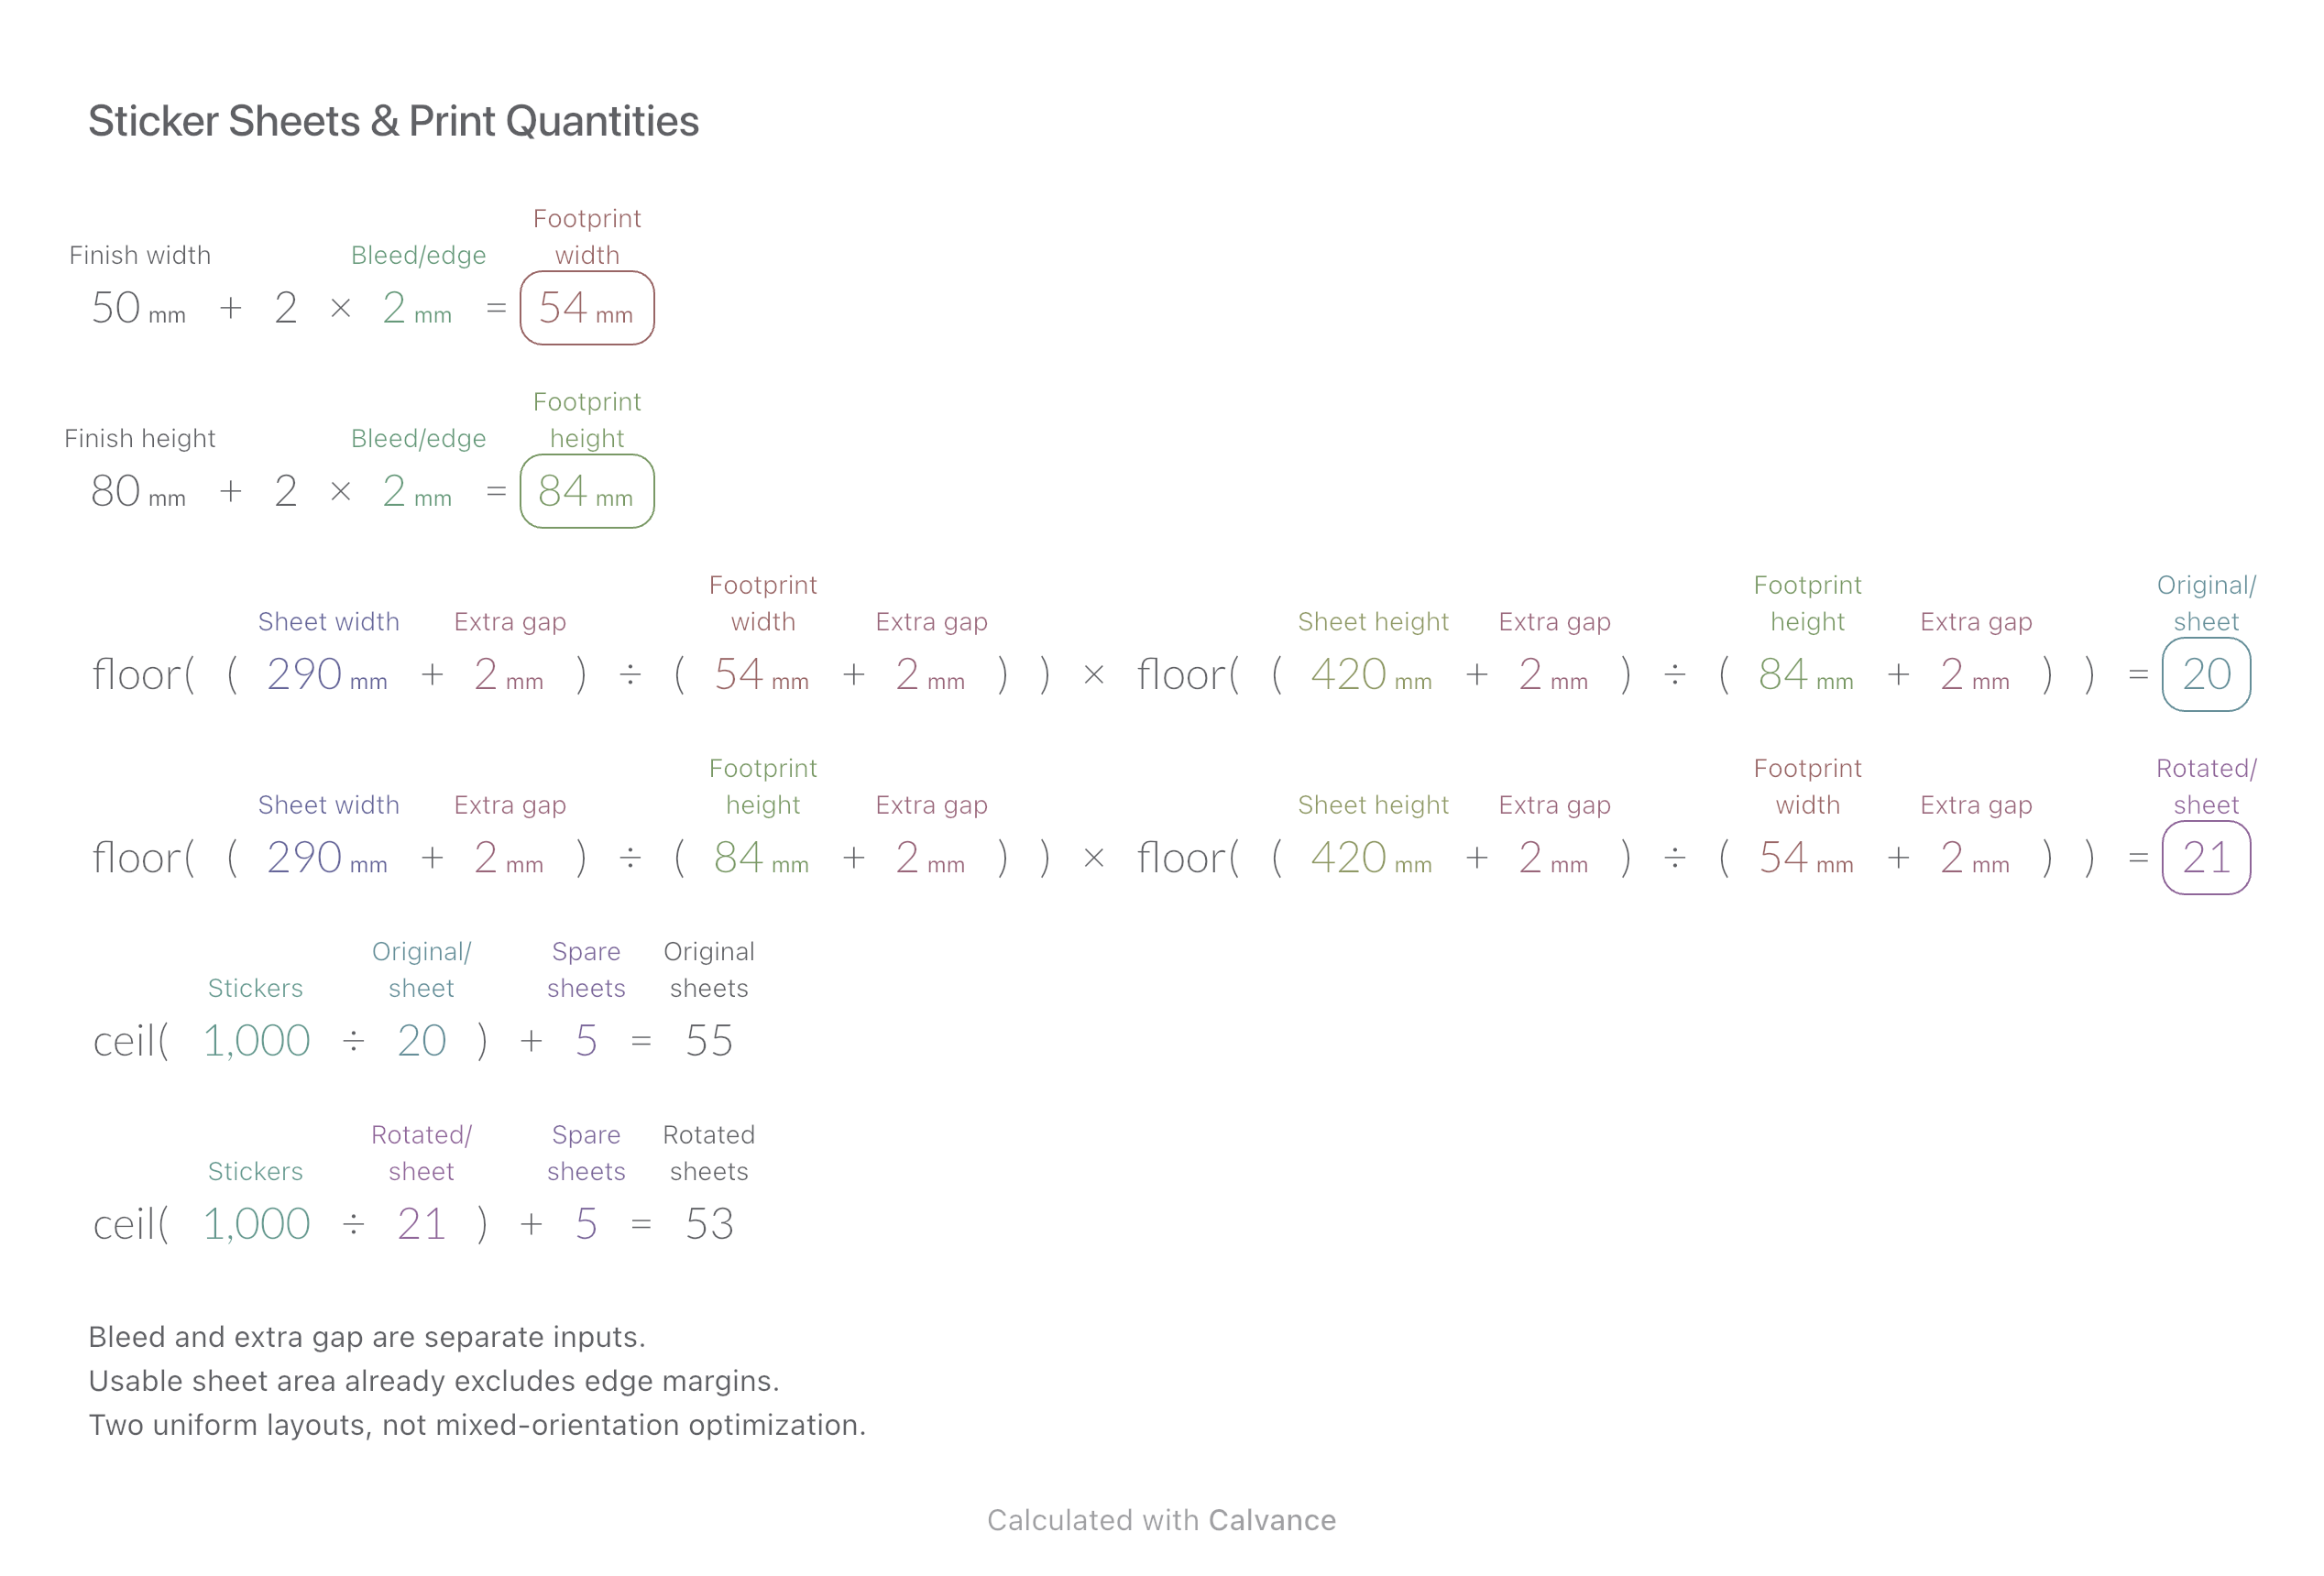
Exported by the iOS App After importing, edit the numbers in Calvance.
For identical rectangular stickers cut from full-sheet material. Sheet dimensions are the usable printing/cutting rectangle after printer and edge margins. The example uses 290 × 420 mm of usable area; it does not claim this is a standard A3 printable area.
Related: Book Spine & Cover Dimensions and Booklet Paper & Whole Packs.
| Inputs | Default |
|---|---|
| Finished sticker width (mm) | 50 |
| Bleed per edge (mm) | 2 |
| Finished sticker height (mm) | 80 |
| Usable sheet width (mm) | 290 |
| Extra gap between bleed footprints (mm) | 2 |
| Usable sheet height (mm) | 420 |
| Stickers required | 1,000 |
| Spare sheets | 5 |
Footprint = finished size + twice the per-edge bleed. Along any sheet edge, capacity = floor((usable edge + extra gap)/(footprint + extra gap)); the last item needs no extra outside gap. Multiply the two edge capacities for each uniform orientation. Sheets = ceil(stickers/capacity) + spare sheets. At 50 × 80 mm, footprints are54 × 84 mm:20 or21 stickers per sheet, requiring55 or53 sheets including5 spares.
50 [Finished sticker width mm] + 2 × 2 [Bleed per edge mm] → Width including bleed mm
80 [Finished sticker height mm] + 2 × Bleed per edge mm → Height including bleed mm
floor((290 [Usable sheet width mm] + 2 [Extra gap between bleed footprints mm])/(Width including bleed mm + Extra gap between bleed footprints mm)) × floor((420 [Usable sheet height mm] + Extra gap between bleed footprints mm)/(Height including bleed mm + Extra gap between bleed footprints mm)) → Stickers per sheet, original orientation
floor((Usable sheet width mm + Extra gap between bleed footprints mm)/(Height including bleed mm + Extra gap between bleed footprints mm)) × floor((Usable sheet height mm + Extra gap between bleed footprints mm)/(Width including bleed mm + Extra gap between bleed footprints mm)) → Stickers per sheet, rotated 90°
ceil(1,000 [Stickers required]/Stickers per sheet, original orientation) + 5 [Spare sheets] → Planned sheets, original orientation
ceil(Stickers required/Stickers per sheet, rotated 90°) + Spare sheets → Planned sheets, rotated 90°
Change only finished width from50 to60 mm. The footprint becomes64 × 84 mm; capacities are16 and18, and planned sheets become68 and61, including the same5 spares.
| Result | Default | Changed |
|---|---|---|
| Width including bleed (mm) | 54 | 64 |
| Height including bleed (mm) | 84 | 84 |
| Stickers per sheet, original orientation | 20 | 16 |
| Stickers per sheet, rotated 90° | 21 | 18 |
| Planned sheets, original orientation | 55 | 68 |
| Planned sheets, rotated 90° | 53 | 61 |
Results are displayed to at most two decimal places; later formulas use unrounded values.
All finished and sheet dimensions must be positive; bleed and gap nonnegative, sticker quantity a positive integer and spare sheets a nonnegative integer. A zero capacity makes that orientation’s sheet result undefined, not zero sheets. Rotation must be allowed by material, artwork and production requirements. This does not draw a layout, produce a cut file or apply to pre-cut label templates. Spare sheets are a chosen allowance, not a quality-yield guarantee.
Download and import into Calvance to edit the numbers. The canvas does not reject every invalid input; check the stated ranges.
No. The extra gap is between bleed footprints. Finished edges are separated by two bleeds plus that gap; do not add the same bleed twice.
No. Grain, artwork orientation, cutting and machine constraints may forbid rotation. Compare only permitted layouts; mixed orientations may fit differently.
We recommend using the latest version of Calvance.
Estimate rectangular aquarium water volume, choose a water-change share and work out how many bucket fills to prepare.
View template and method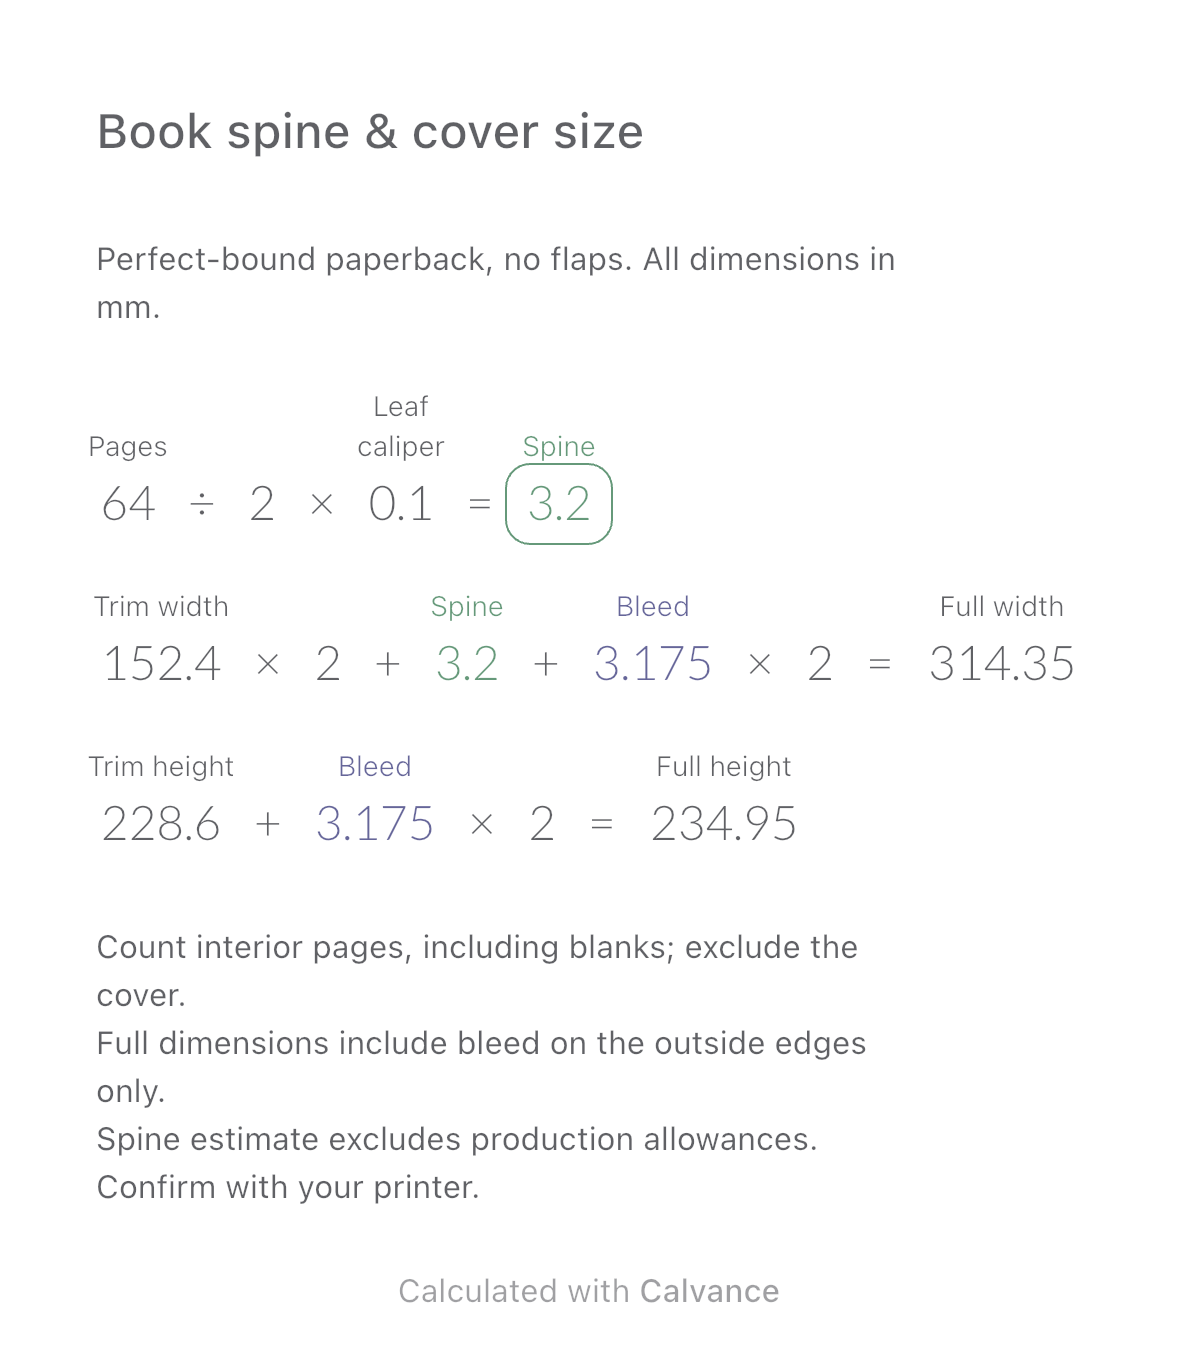
Estimate a perfect-bound book’s spine and full cover dimensions from page count, paper caliper and bleed. Compare changes and download a reusable Calvance canvas.
View template and method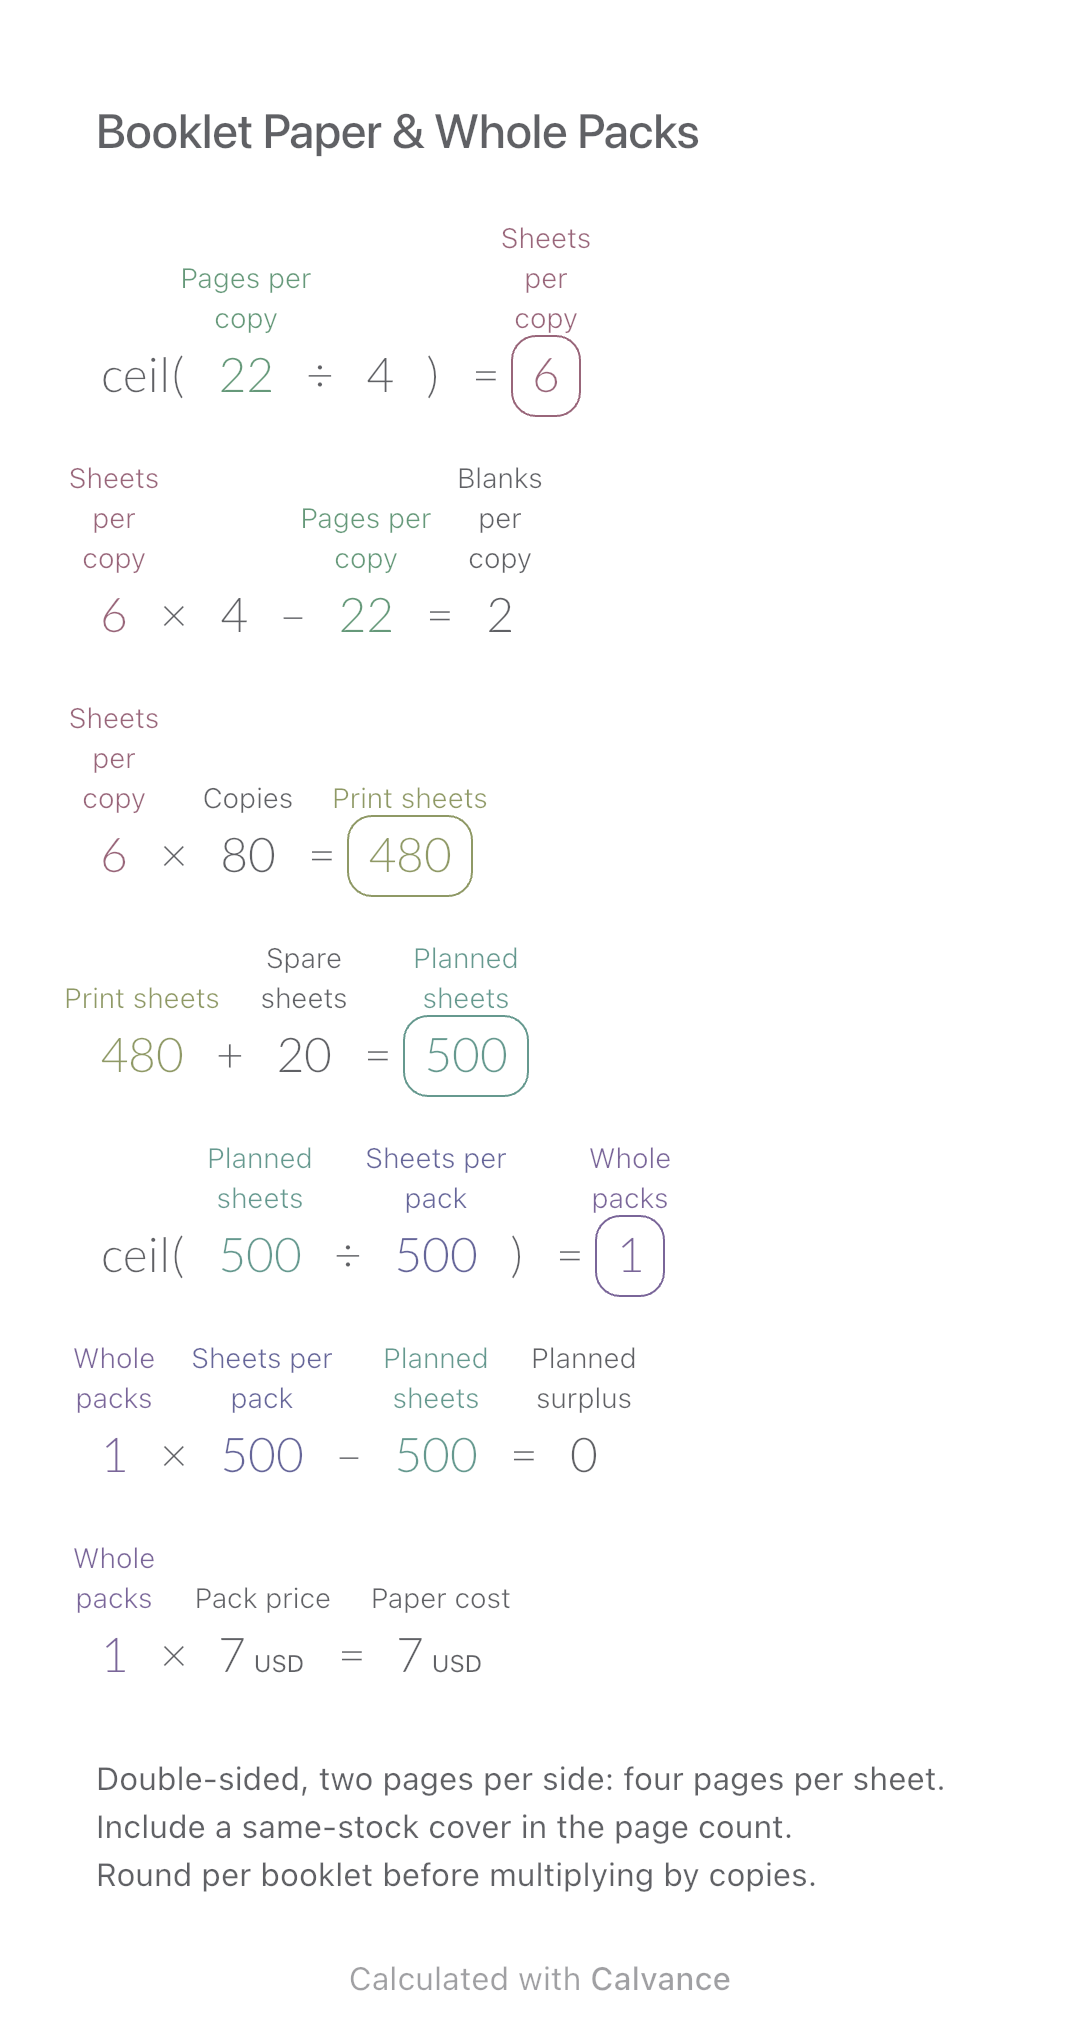
Convert booklet pages and copies into physical sheets, blank pages, whole paper packs and purchase cost.
View template and methodChoose a plan when you need more canvases, high-resolution image exports, or sync across devices.