
Worked exampleExported from Calvance
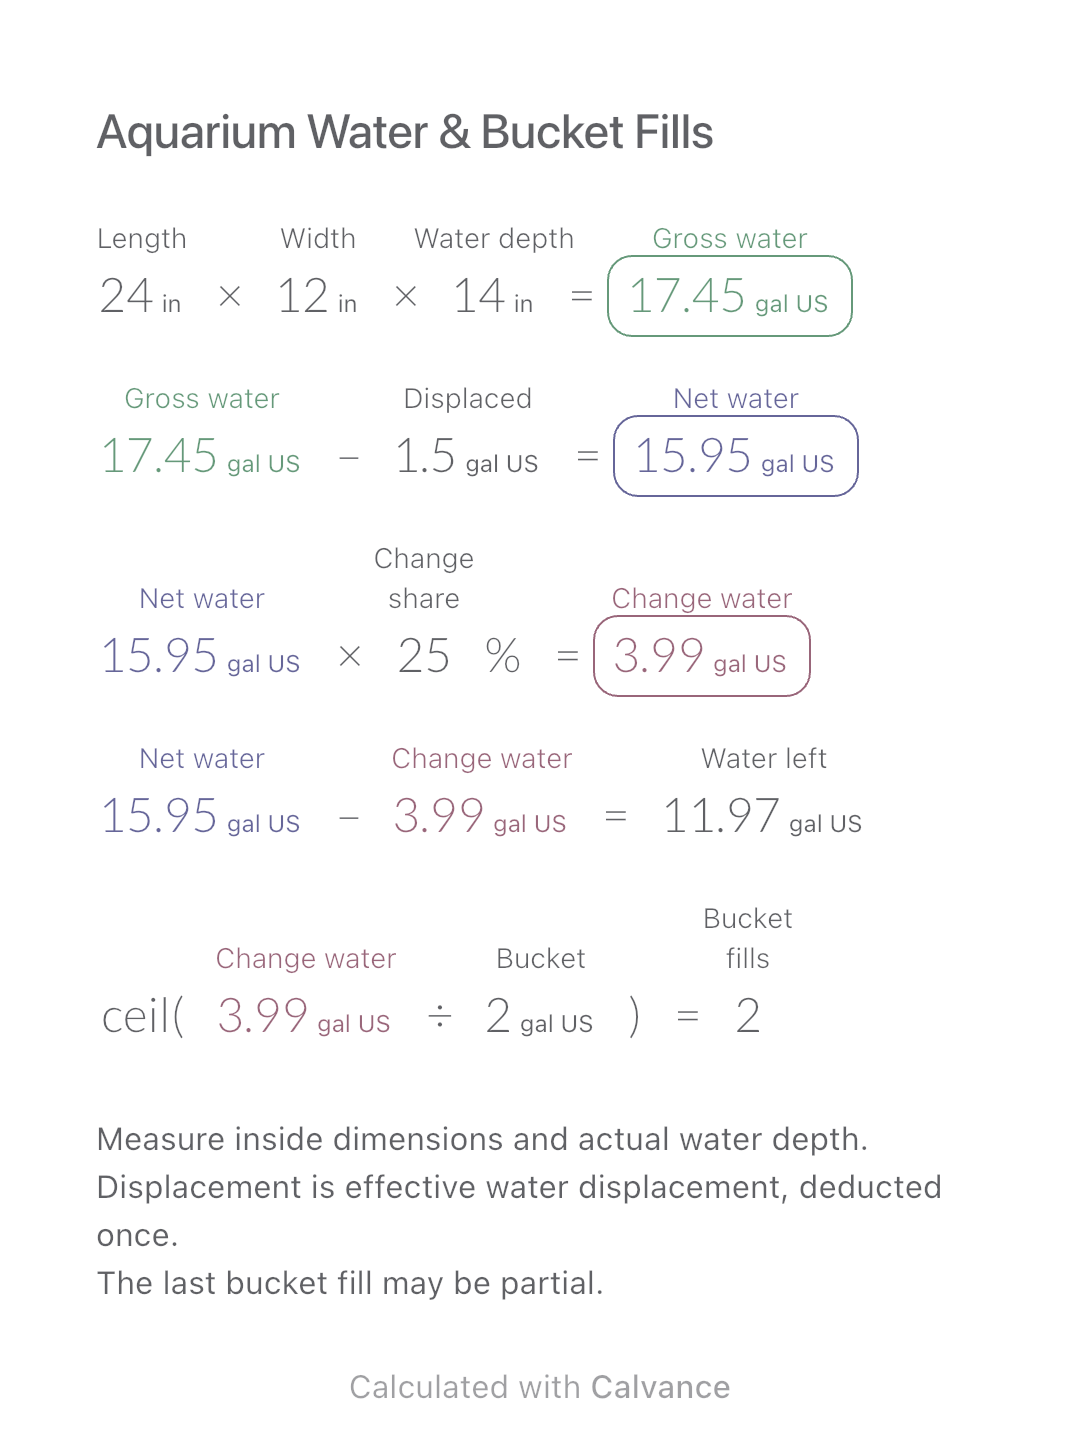
Aquarium Water & Bucket Fills
Estimate rectangular aquarium water volume, choose a water-change share and work out how many bucket fills to prepare.
View template and methodEstimate grout weight and whole-kit quantities from tile size, joint dimensions, mixed density and tiled area.
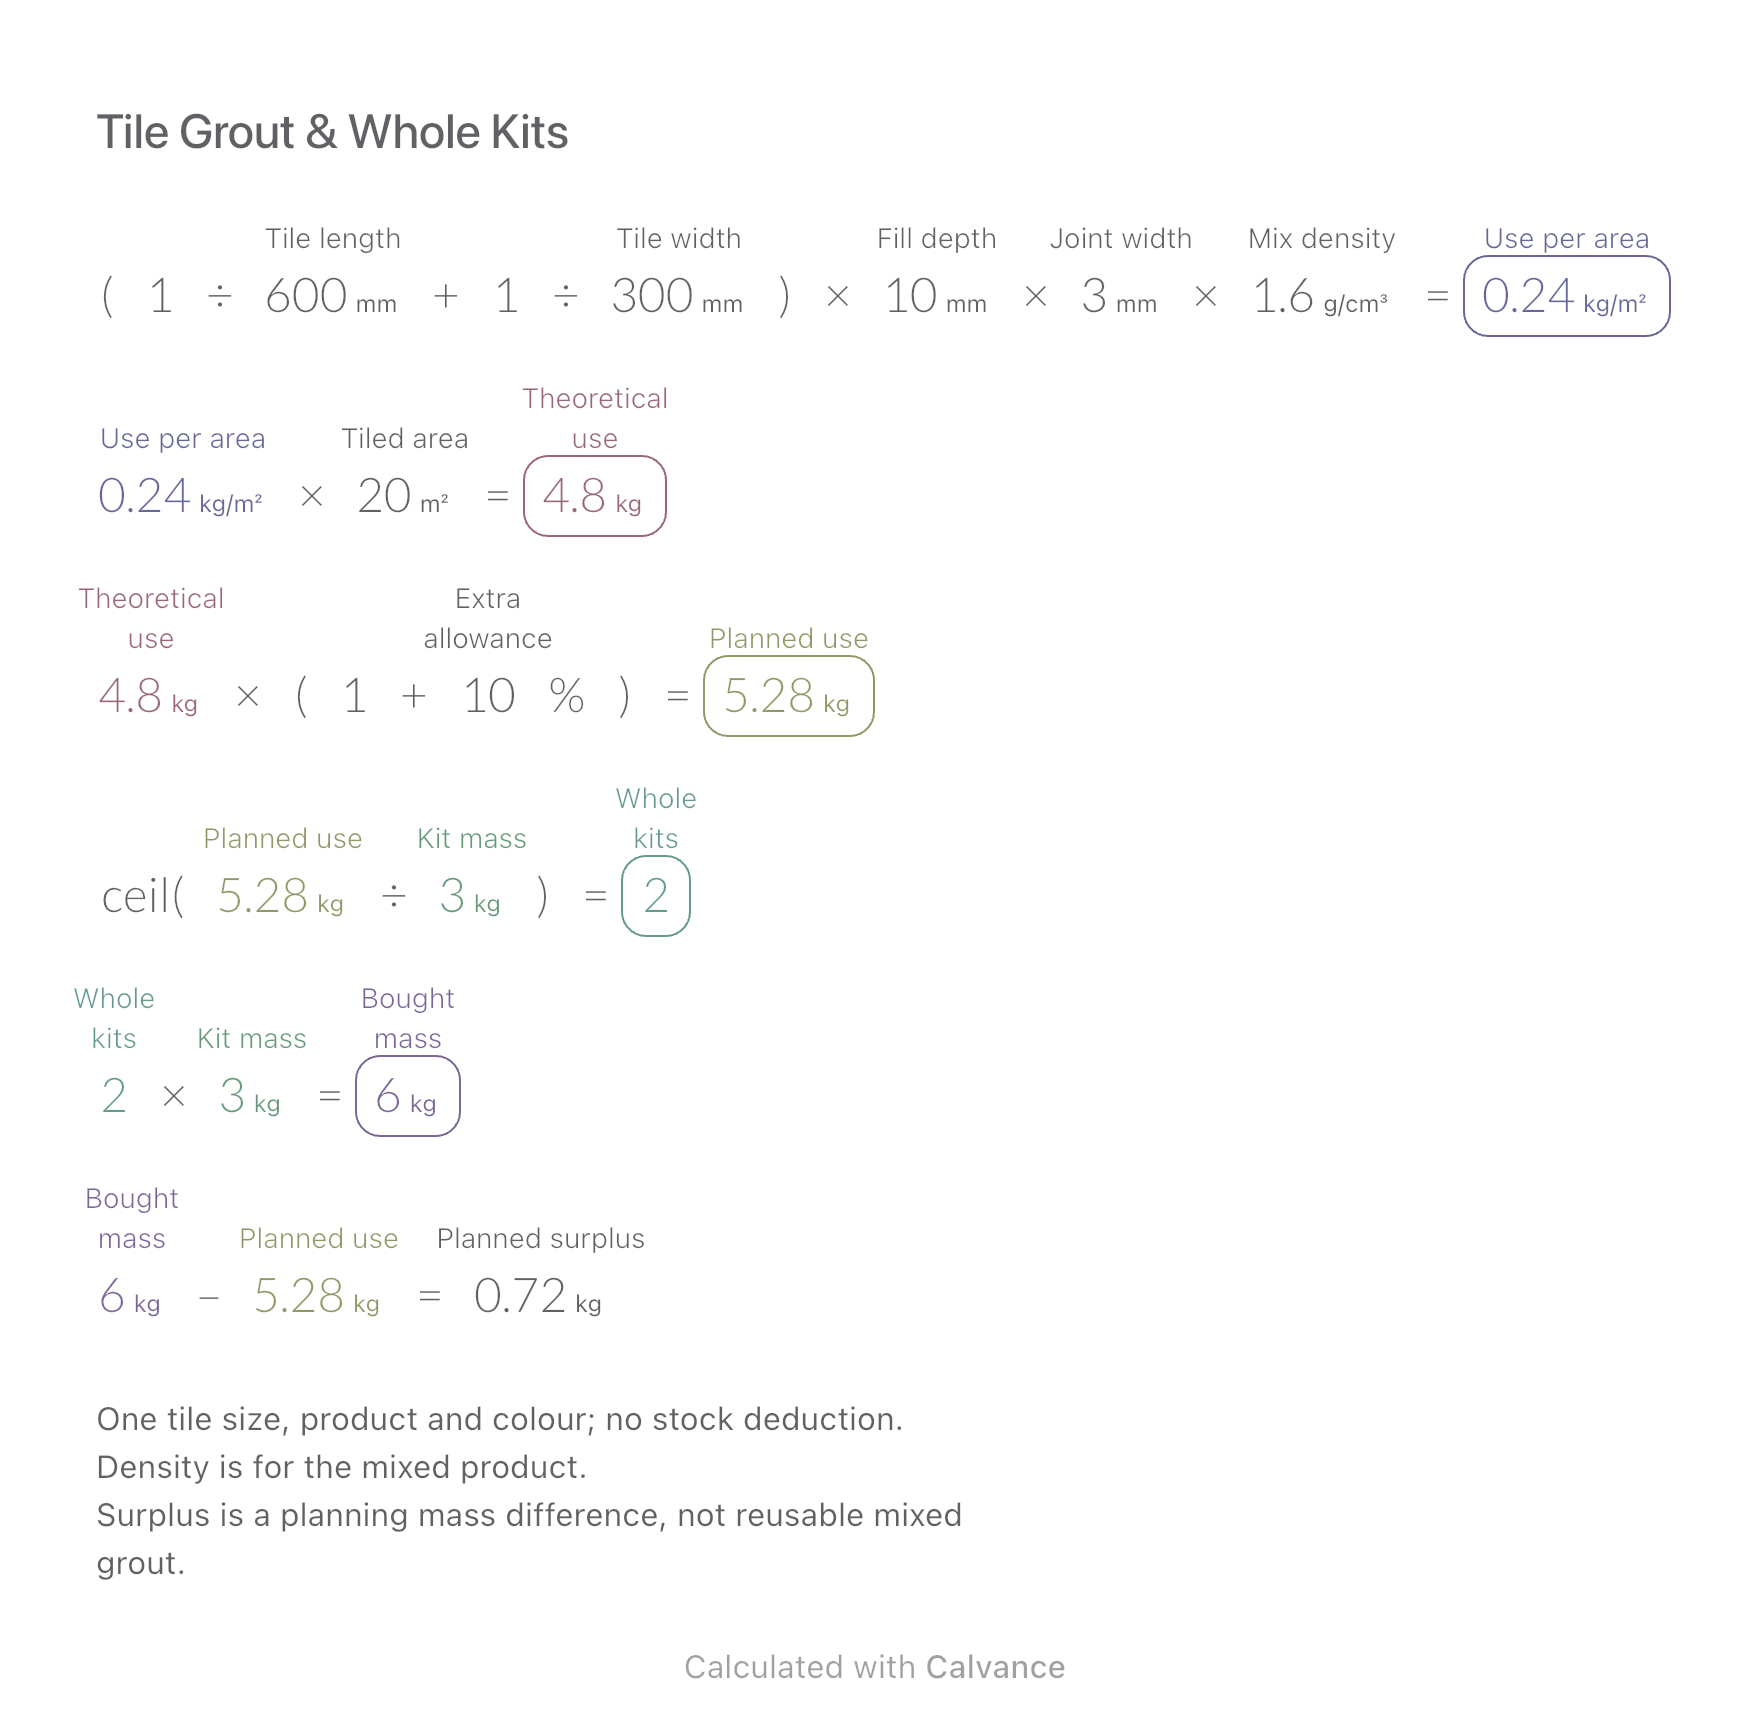
Exported by the iOS App After importing, edit the numbers in Calvance.
This example is for complete two-part epoxy grout kits (A+B), with no added mixing water. Do not compare mixed-product mass with the dry powder mass of a cement-grout bag.
For one rectangular tile size, one grout product and one colour. Enter the depth required by the product’s estimating method and the actual joint conditions. The metric example is illustrative; density and kit size are editable.
Related: Tile Quantities & Full Boxes and Tile Adhesive & Whole Bags.
| Inputs | Default |
|---|---|
| Tile length (mm) | 600 |
| Tile width (mm) | 300 |
| Depth used by the product’s estimating method (mm) | 10 |
| Joint width (mm) | 3 |
| Mixed-product density (g/cm³) | 1.6 |
| Tiled area (m²) | 20 |
| Extra allowance (%) | 10 |
| Total net mass per kit (kg) | 3 |
Estimated kg/m² = (1/tile length + 1/tile width) × depth × joint width × mixed density, with physical units carried through. Multiply by tiled area, then by 1 + allowance. Divide by kit mass and round up. At 3 mm joints: 0.24 kg/m², 4.8 kg theoretical and 5.28 kg planned; two 3 kg kits buy 6 kg, 0.72 kg above the plan.
(1/600 [Tile length mm] + 1/300 [Tile width mm]) × 10 [Depth used by the product’s estimating method mm] × 3 [Joint width mm] × 1.6 [Mixed-product density g/cm³] → Estimated grout per unit area kg/m²
Estimated grout per unit area kg/m² × 20 [Tiled area m²] → Theoretical grout mass kg
Theoretical grout mass kg × (1 + 10 [Extra allowance]%) → Planned mass including allowance kg
ceil(Planned mass including allowance kg/3 [Total net mass per kit kg]) → Whole kits to buy
Whole kits to buy × Total net mass per kit kg → Purchased net mass kg
Purchased net mass kg-Planned mass including allowance kg → Mass above the plan kg
Change only joint width from 3 to 5 mm. Use becomes 0.4 kg/m²; the plan is 8.8 kg, requiring three kits totalling 9 kg, with 0.2 kg above the plan.
| Result | Default | Changed |
|---|---|---|
| Estimated grout per unit area (kg/m²) | 0.24 | 0.4 |
| Theoretical grout mass (kg) | 4.8 | 8 |
| Planned mass including allowance (kg) | 5.28 | 8.8 |
| Whole kits to buy | 2 | 3 |
| Purchased net mass (kg) | 6 | 9 |
| Mass above the plan (kg) | 0.72 | 0.2 |
Results are displayed to at most two decimal places; later formulas use unrounded values.
Tile dimensions, depth, joint width, density and kit mass must be positive; area and allowance nonnegative. This manufacturer-style approximation is not an exact count of every joint in a finite room. Surface texture, actual joint shape and application losses affect consumption. The 1.6 g/cm³ density and 10% allowance are example inputs, not universal product values. Whole-kit mass means all components together; this is not a mixing-ratio or cartridge-sealant calculator.
Sources: Weber input guide, MAPEI technical sheet, 2022 UK archive.
Download and import into Calvance to edit the numbers. The canvas does not reject every invalid input; check the stated ranges.
Use the product’s appropriate estimating method and density. Rounded table entries can differ from a calculation using unrounded inputs; do not infer density from them.
Not necessarily. The difference is purchased mass minus the plan. Pot life, batch mixing and storage suitability are outside this calculation.
We recommend using the latest version of Calvance.
Estimate rectangular aquarium water volume, choose a water-change share and work out how many bucket fills to prepare.
View template and method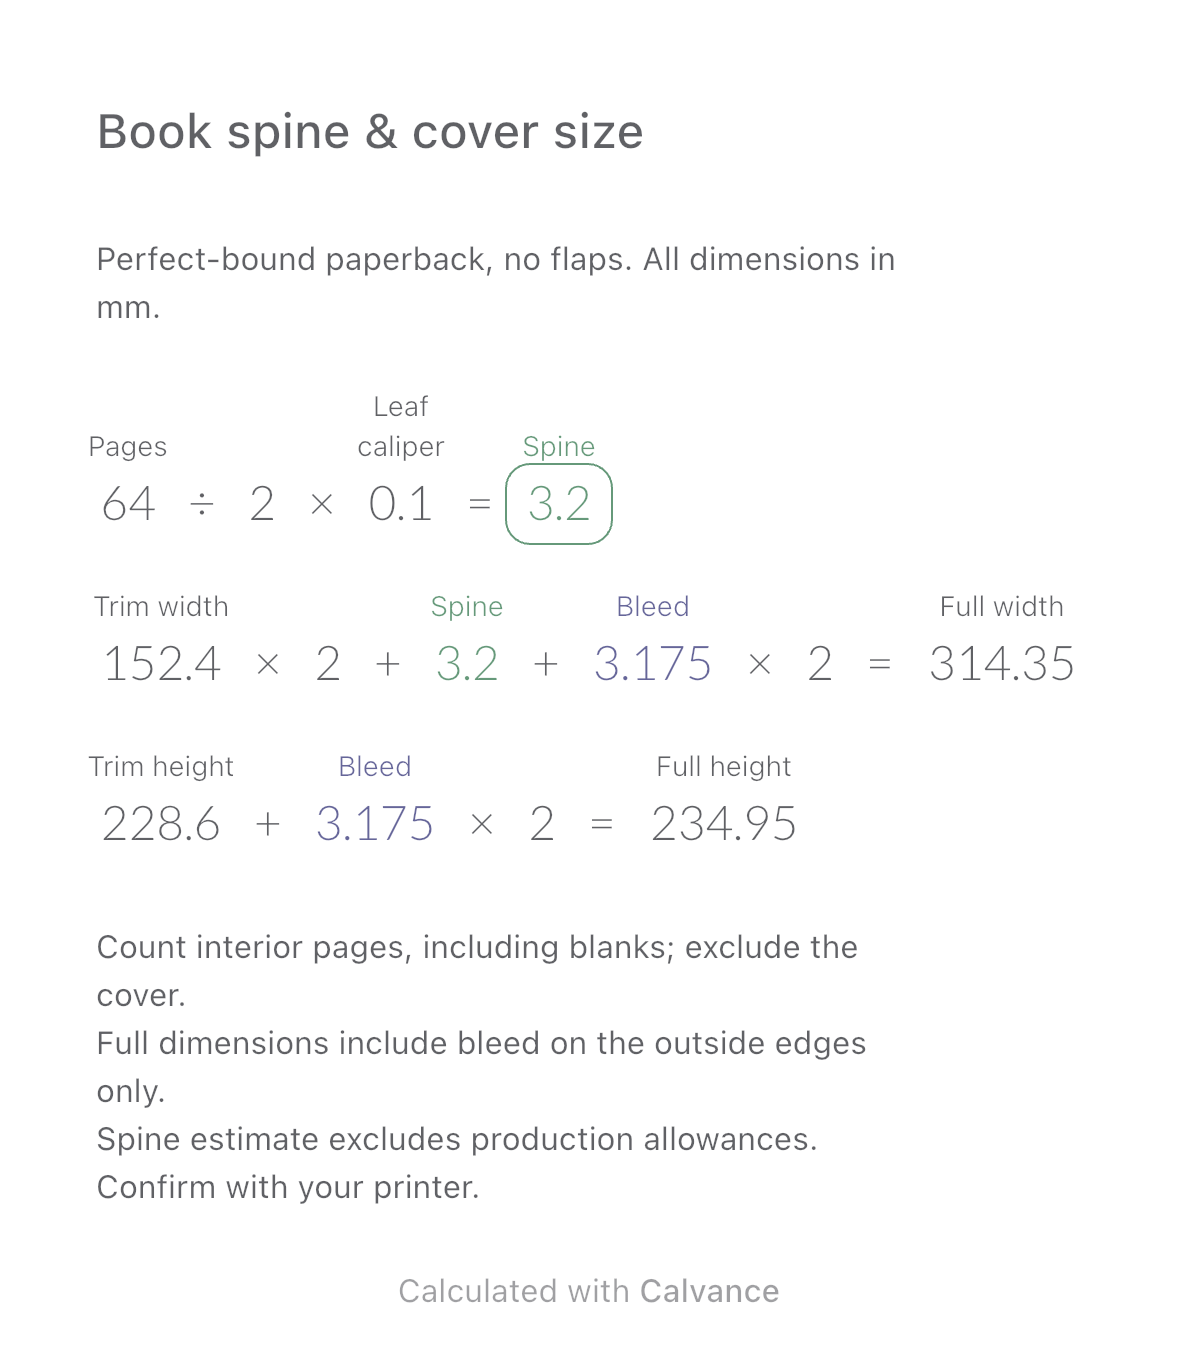
Estimate a perfect-bound book’s spine and full cover dimensions from page count, paper caliper and bleed. Compare changes and download a reusable Calvance canvas.
View template and method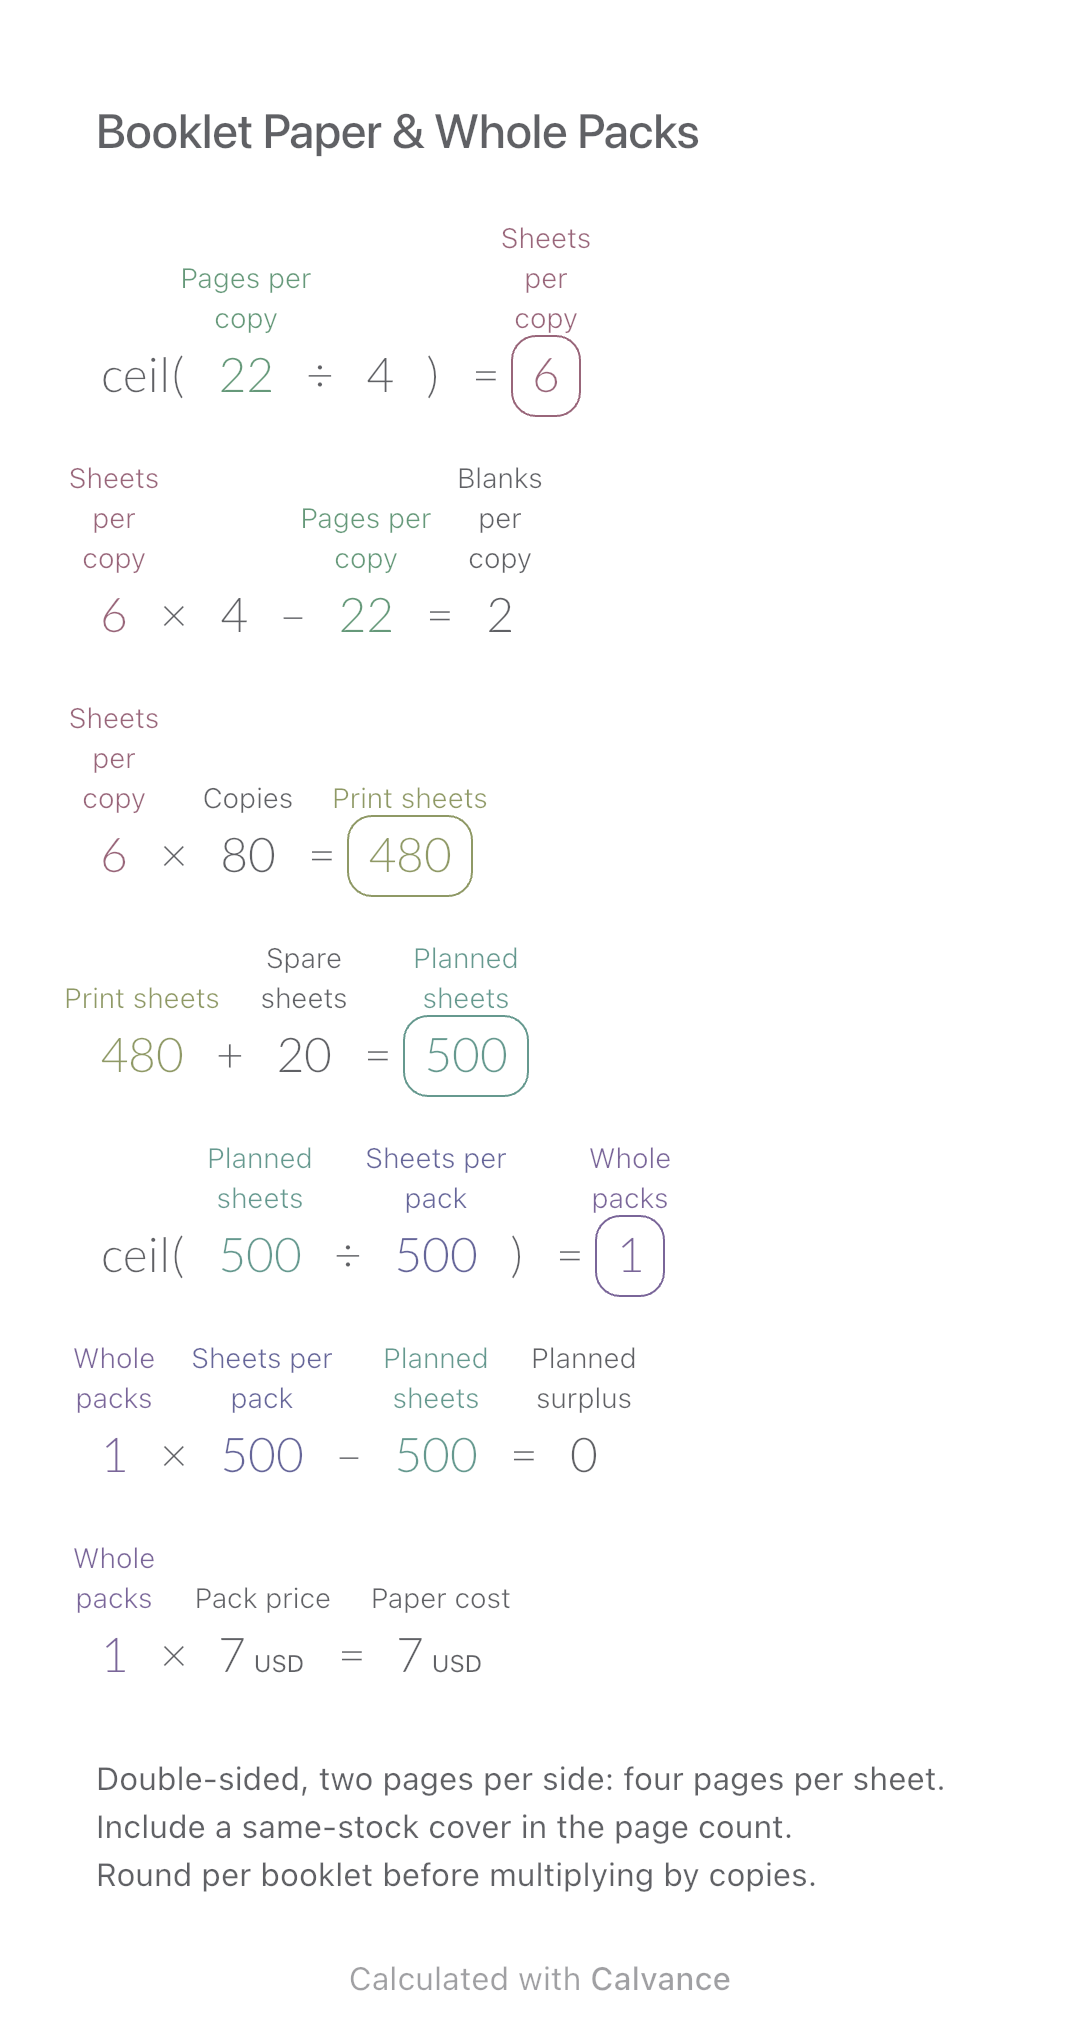
Convert booklet pages and copies into physical sheets, blank pages, whole paper packs and purchase cost.
View template and methodChoose a plan when you need more canvases, high-resolution image exports, or sync across devices.