
Worked exampleExported from Calvance
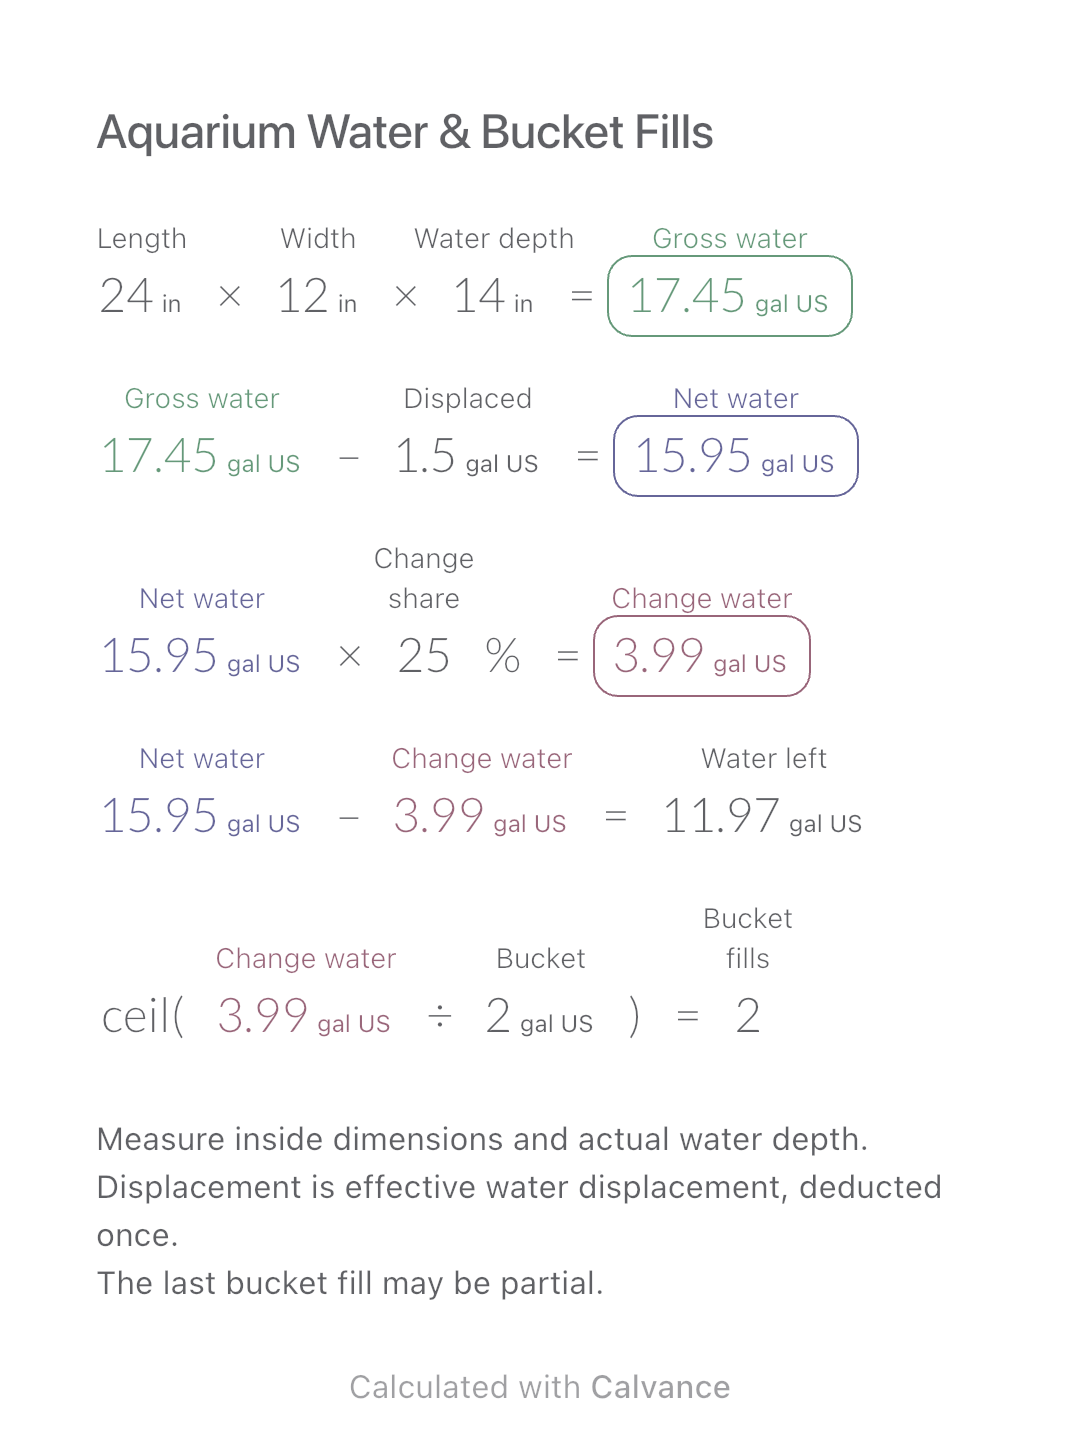
Aquarium Water & Bucket Fills
Estimate rectangular aquarium water volume, choose a water-change share and work out how many bucket fills to prepare.
View template and methodEstimate tile pieces and full boxes for a rectangular floor. Includes an allowance, a worked metric example and an editable Calvance canvas.
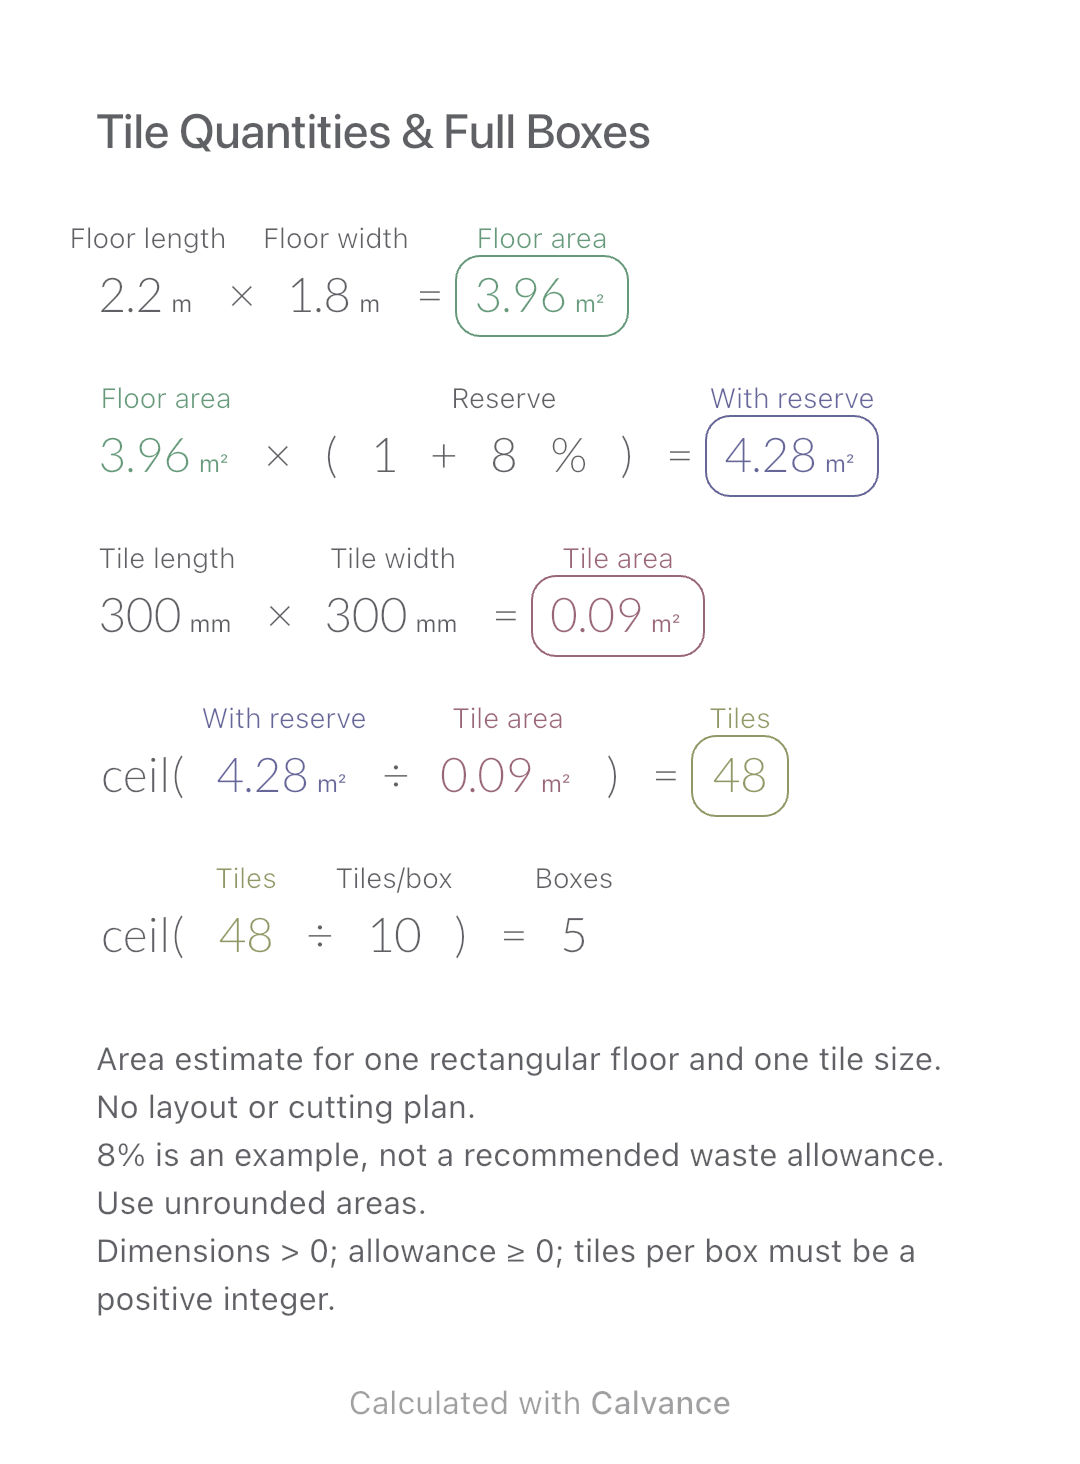
Exported by the iOS App After importing, edit the numbers in Calvance.
Before ordering one tile style for a rectangular floor, estimate how many pieces and full boxes the area requires. This page provides the method and a downloadable canvas, not an online tile-layout planner. The example uses metres and millimetres; enter each measurement with its matching compatible unit in the App.
| Inputs | Default |
|---|---|
| Floor length (m) | 2.2 |
| Floor width (m) | 1.8 |
| Allowance added to floor area (%) | 8 |
| Tile length (mm) | 300 |
| Tile width (mm) | 300 |
| Tiles per box | 10 |
Multiply floor length by width, then add the chosen percentage of that net area. Tile length × width carries its units; Calvance converts the resulting area from mm² to m², with no manual division by 1,000,000. Divide the area including allowance by one tile’s area and round up to a whole piece. Divide that piece count by tiles per box and round up again. Here 2.2 × 1.8 = 3.96 m²; adding 8% gives 4.2768 m². A 300 × 300 mm tile covers 0.09 m². Rounding 47.52 up gives 48 pieces; 10 per box means 5 boxes, containing 50 pieces. The two pieces above the 48-piece estimate come from box rounding, not from an extra allowance.
2.2 [Floor length m] × 1.8 [Floor width m] → Floor area m²
Floor area m² × (1 + 8 [Allowance added to floor area]%) → Area including allowance m²
300 [Tile length mm] × 300 [Tile width mm] → Area per tile m²
ceil(Area including allowance m²/Area per tile m²) → Estimated tile pieces
ceil(Estimated tile pieces/10 [Tiles per box]) → Full boxes to buy
Change only the box contents from 10 to 8 tiles. All areas and the 48-piece estimate stay the same, but the purchase changes from 5 to 6 full boxes. At 8 per box those 6 boxes contain 48 pieces. A larger box count does not tell you which option costs more.
| Result | Default | Changed |
|---|---|---|
| Floor area (m²) | 3.96 | 3.96 |
| Area including allowance (m²) | 4.28 | 4.28 |
| Area per tile (m²) | 0.09 | 0.09 |
| Estimated tile pieces | 48 | 48 |
| Full boxes to buy | 5 | 6 |
Results are displayed to at most two decimal places; later formulas use unrounded values.
The model does not subtract untiled areas or account for grout joints, cutting reuse, pattern, breakage, adhesive, grout quantity or price. Set the allowance for the actual project and check the manufacturer’s dimensions, pieces per box and stated coverage. Nominal dimensions can differ from usable coverage. This estimate cannot guarantee enough tiles on site.
Download and import into Calvance to edit the numbers. The canvas does not reject every invalid input; check the stated ranges.
A fractional tile is counted as a whole piece, and a partial box as a whole box. Exactly 50 pieces at 10 per box need 5 boxes; 51 pieces need 6. This does not optimize where cuts are reused.
No. It is only this example’s allowance relative to net floor area. Select it from the actual layout and installation requirements; do not treat it as a guaranteed loss rate.
Check its stated coverage with the supplier. For an area-only estimate, divide the area including allowance by coverage per carton and round up. This canvas instead expects a positive whole-number piece count per box; do not enter square metres in that input.
We recommend using the latest version of Calvance.
Estimate rectangular aquarium water volume, choose a water-change share and work out how many bucket fills to prepare.
View template and method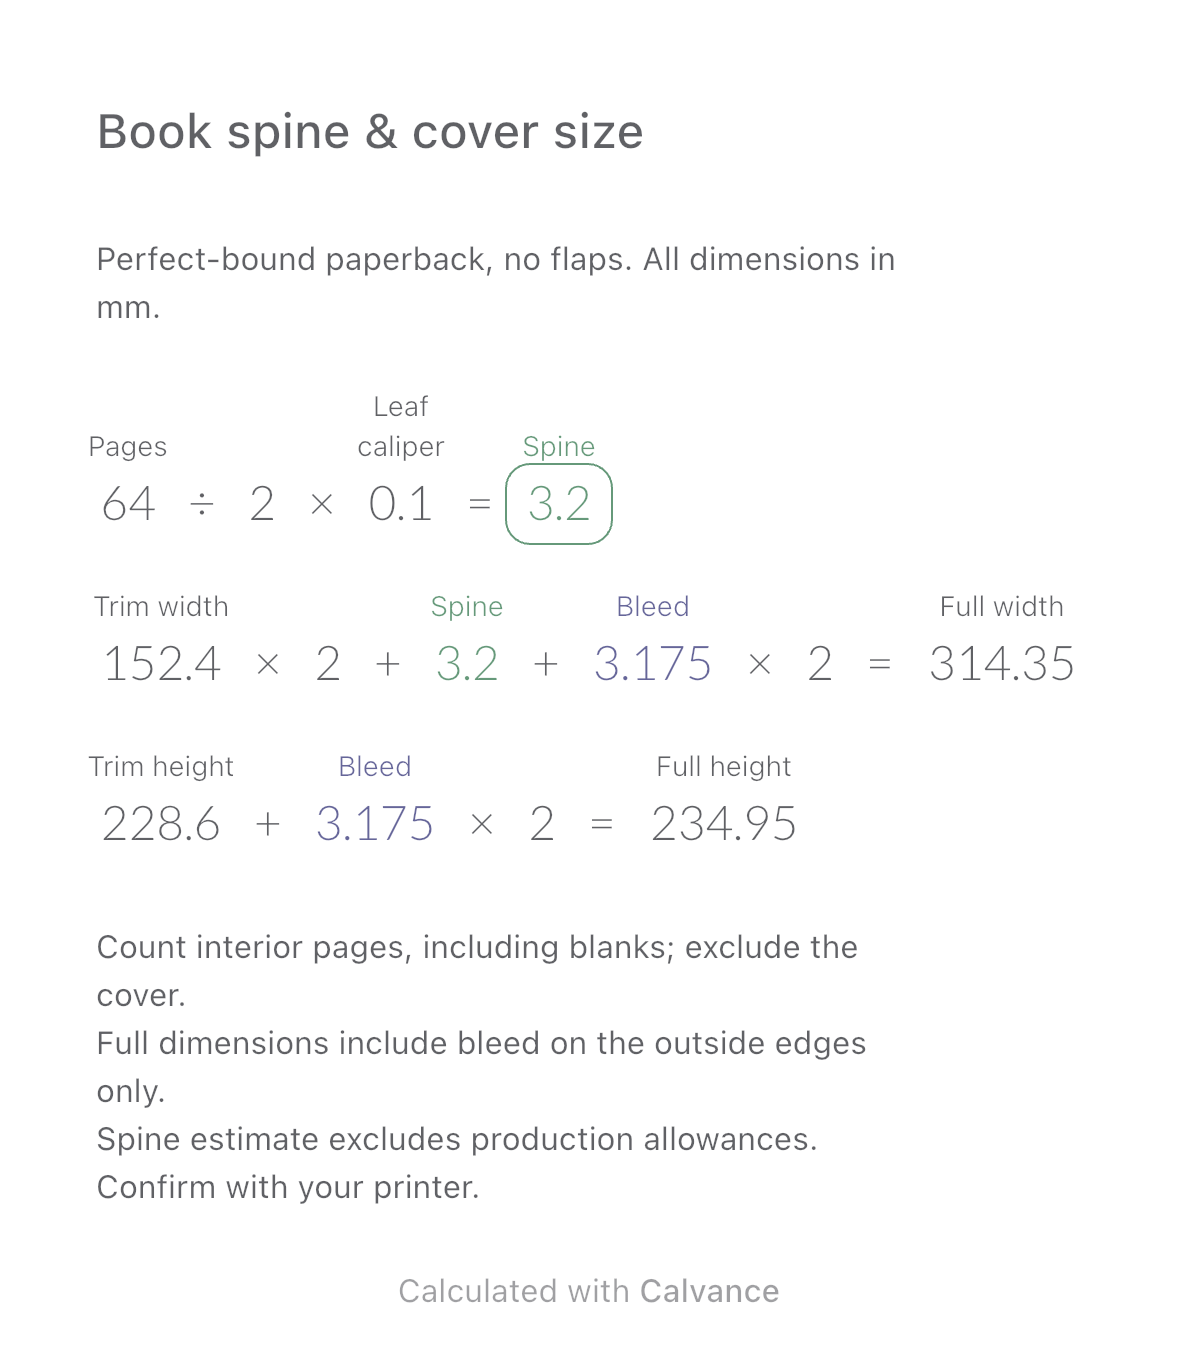
Estimate a perfect-bound book’s spine and full cover dimensions from page count, paper caliper and bleed. Compare changes and download a reusable Calvance canvas.
View template and method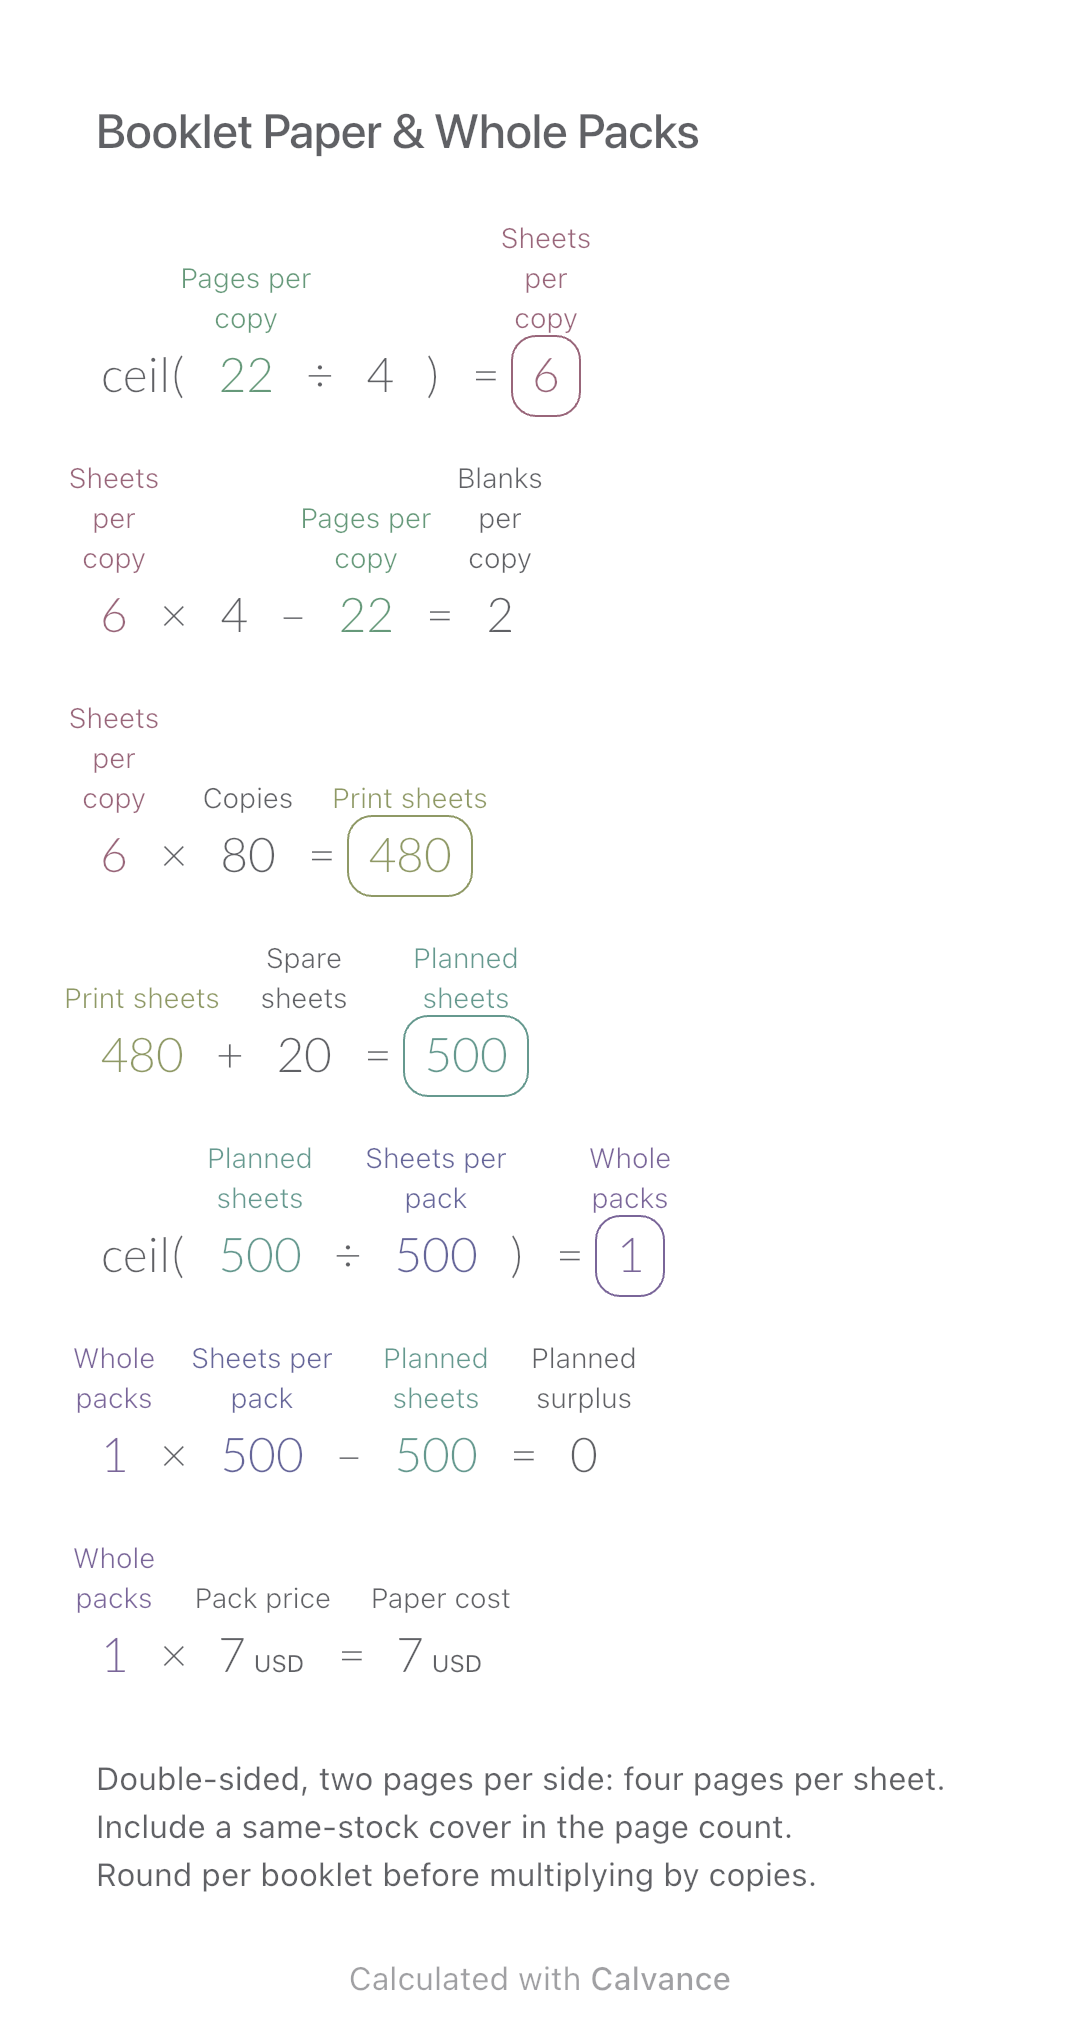
Convert booklet pages and copies into physical sheets, blank pages, whole paper packs and purchase cost.
View template and methodChoose a plan when you need more canvases, high-resolution image exports, or sync across devices.