
Worked exampleExported from Calvance
Aquarium Water & Bucket Fills
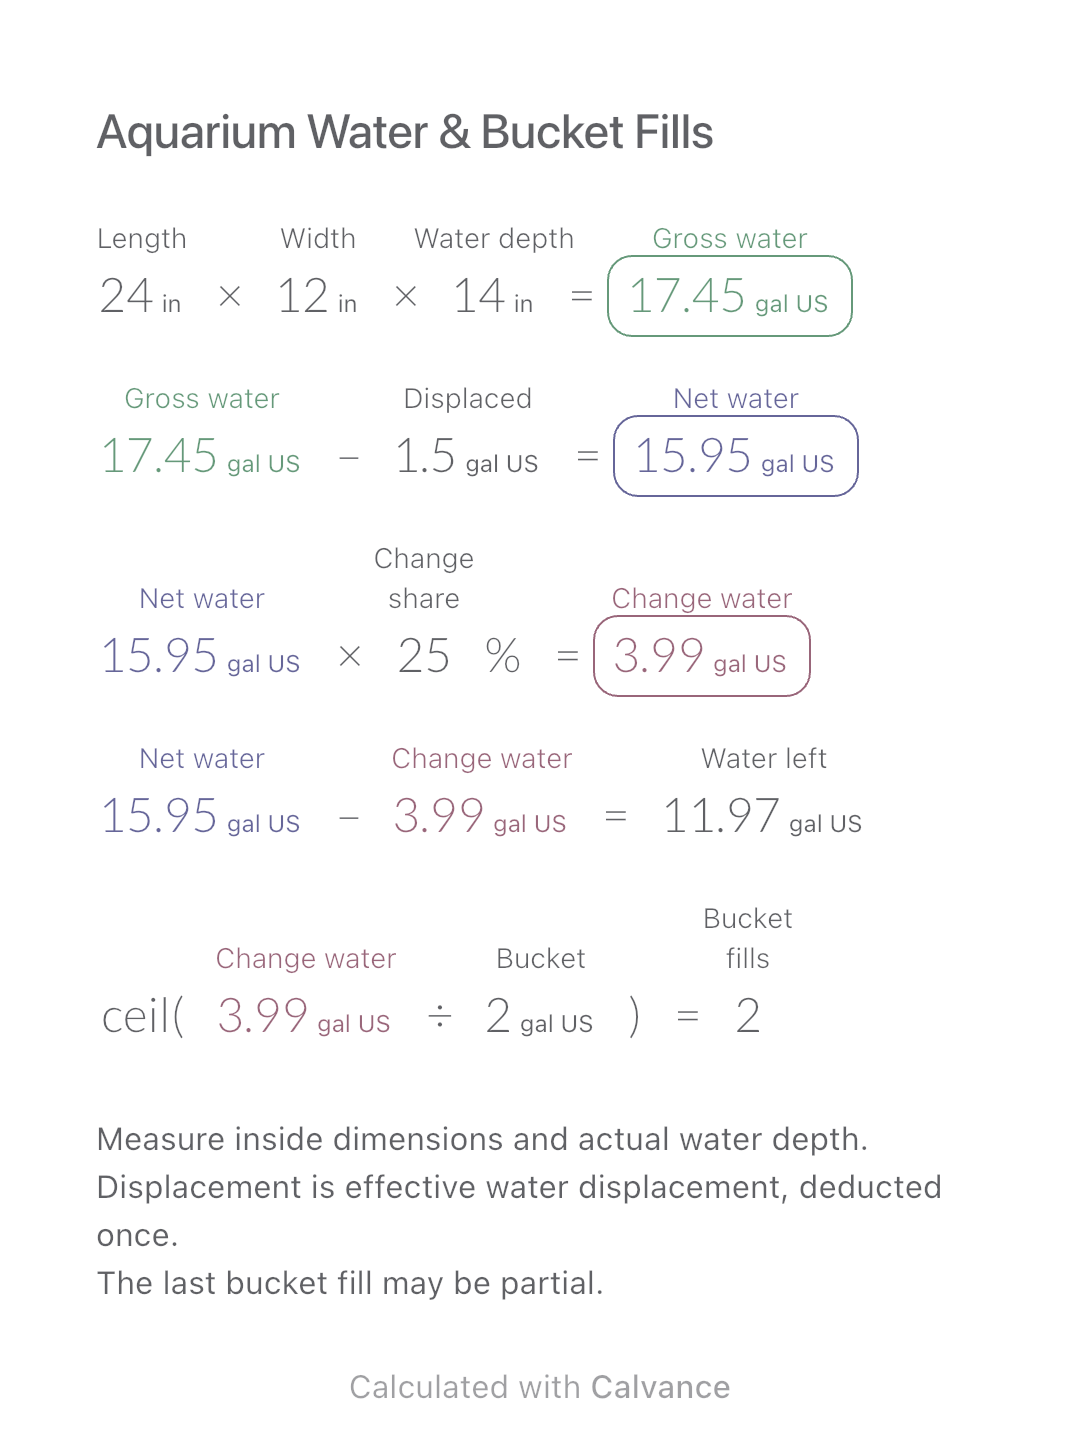
Estimate rectangular aquarium water volume, choose a water-change share and work out how many bucket fills to prepare.
View template and methodEstimate paint for four walls from room dimensions, coverage and coats. Include an allowance, round up to whole cans and see the planned surplus and purchase cost.
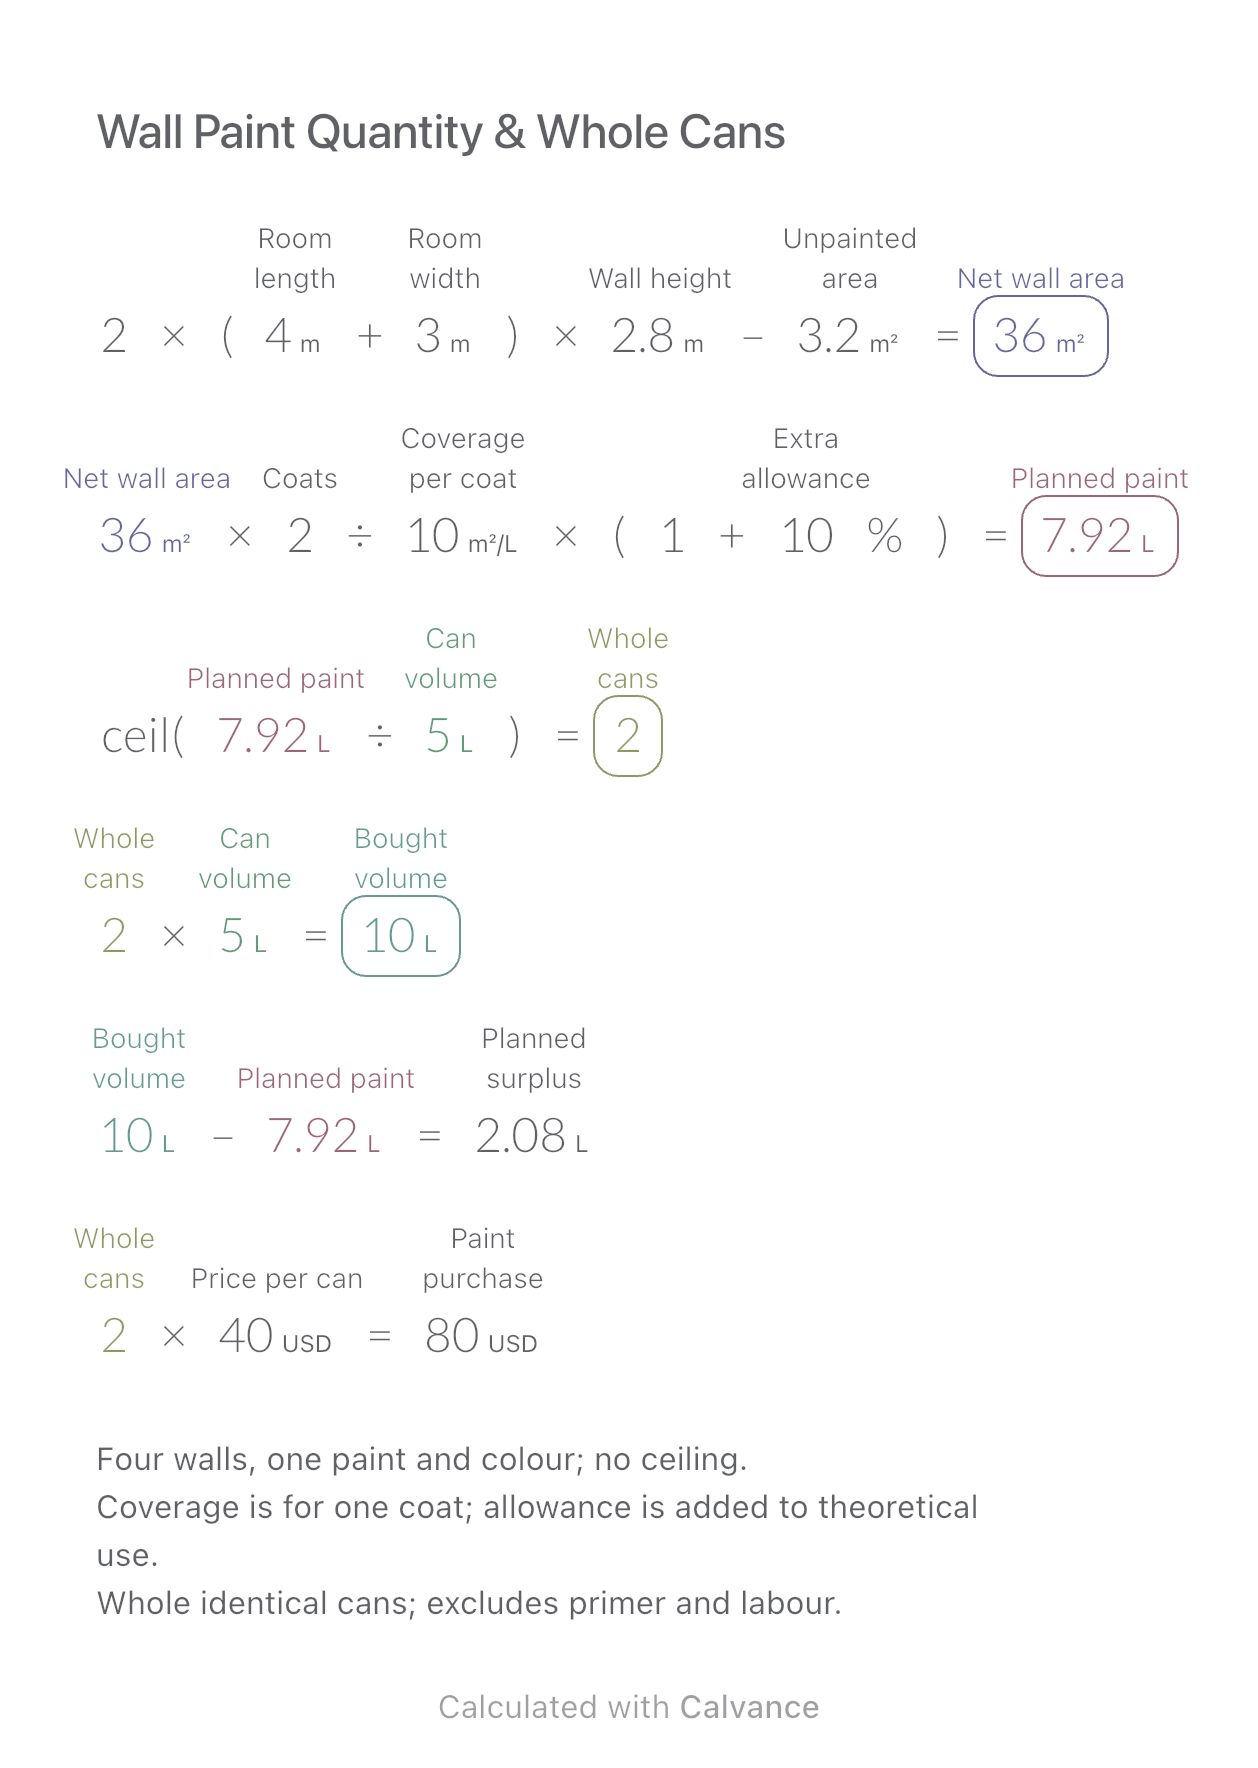
Exported by the iOS App After importing, edit the numbers in Calvance.
Use this metric example for four walls of one rectangular room, all painted with the same product and colour. Enter actual wall dimensions and areas that will not be painted. Prices are simulated USD values, not current quotes; replace them with your own.
Related calculations: Tile Quantities & Full Boxes · Wallpaper Rolls & Material Cost.
USD
| Inputs | Default |
|---|---|
| Room length (m) | 4 |
| Room width (m) | 3 |
| Wall height (m) | 2.8 |
| Unpainted area (m²) | 3.2 |
| Coats | 2 |
| Coverage per coat (m²/L) | 10 |
| Extra allowance (%) | 10 |
| Can volume (L) | 5 |
| Price per can (USD) | 40 |
Net wall area = 2 × (length + width) × height − unpainted area. Divide area × coats by the product’s single-coat coverage, then multiply by 1 + the extra allowance. Round required litres ÷ litres per can up to whole cans. Purchased volume minus planned use is the planned surplus. Multiply whole cans by the can price for the paint-only purchase cost. Units participate in the calculation; round the can count, not the litres. The default gives 36 m², 7.92 L and 2 cans; 10 L purchased leaves a planned 2.08 L surplus.
2 × (4 [Room length m] + 3 [Room width m]) × 2.8 [Wall height m]-3.2 [Unpainted area m²] → Net wall area m²
Net wall area m² × 2 [Coats]/10 [Coverage per coat m²/L] × (1 + 10 [Extra allowance]%) → Planned paint L
ceil(Planned paint L/5 [Can volume L]) → Whole cans
Whole cans × Can volume L → Bought volume L
Bought volume L-Planned paint L → Planned surplus L
Whole cans × 40 [Price per can USD] → Paint purchase USD
Change coats from 2 to 3. Planned use rises to 11.88 L and the purchase to 3 cans. Net wall area stays unchanged; purchased volume, planned surplus and cost update together.
| Result | Default | Changed |
|---|---|---|
| Net wall area (m²) | 36 | 36 |
| Planned paint (L) | 7.92 | 11.88 |
| Whole cans | 2 | 3 |
| Bought volume (L) | 10 | 15 |
| Planned surplus (L) | 2.08 | 3.12 |
| Paint purchase (USD) | 80 | 120 |
Results are displayed to at most two decimal places; later formulas use unrounded values.
Lengths, height, coverage and can capacity must be positive; coats must be a positive integer. Unpainted area must be nonnegative and less than the full wall area; price and allowance must be nonnegative. The 10% allowance is illustrative, not a recommended loss rate. Coverage depends on the product, surface and application. Do not treat kilograms as litres or combine different paints before rounding. This is not a complete decorating quote or a guarantee of remaining paint.
Resene: estimating paint quantities
Download and import into Calvance to edit the numbers. The canvas does not reject every invalid input; check the stated ranges.
First put it on a single-coat basis, or you will count the coats twice. Use the product label or data sheet.
The planned use already includes the allowance. Surplus is purchased volume minus that planned use, not a prediction of actual leftovers.
This page explains the method and example. Download the editable canvas and import it into Calvance to use your own numbers.
We recommend using the latest version of Calvance.
Estimate rectangular aquarium water volume, choose a water-change share and work out how many bucket fills to prepare.
View template and method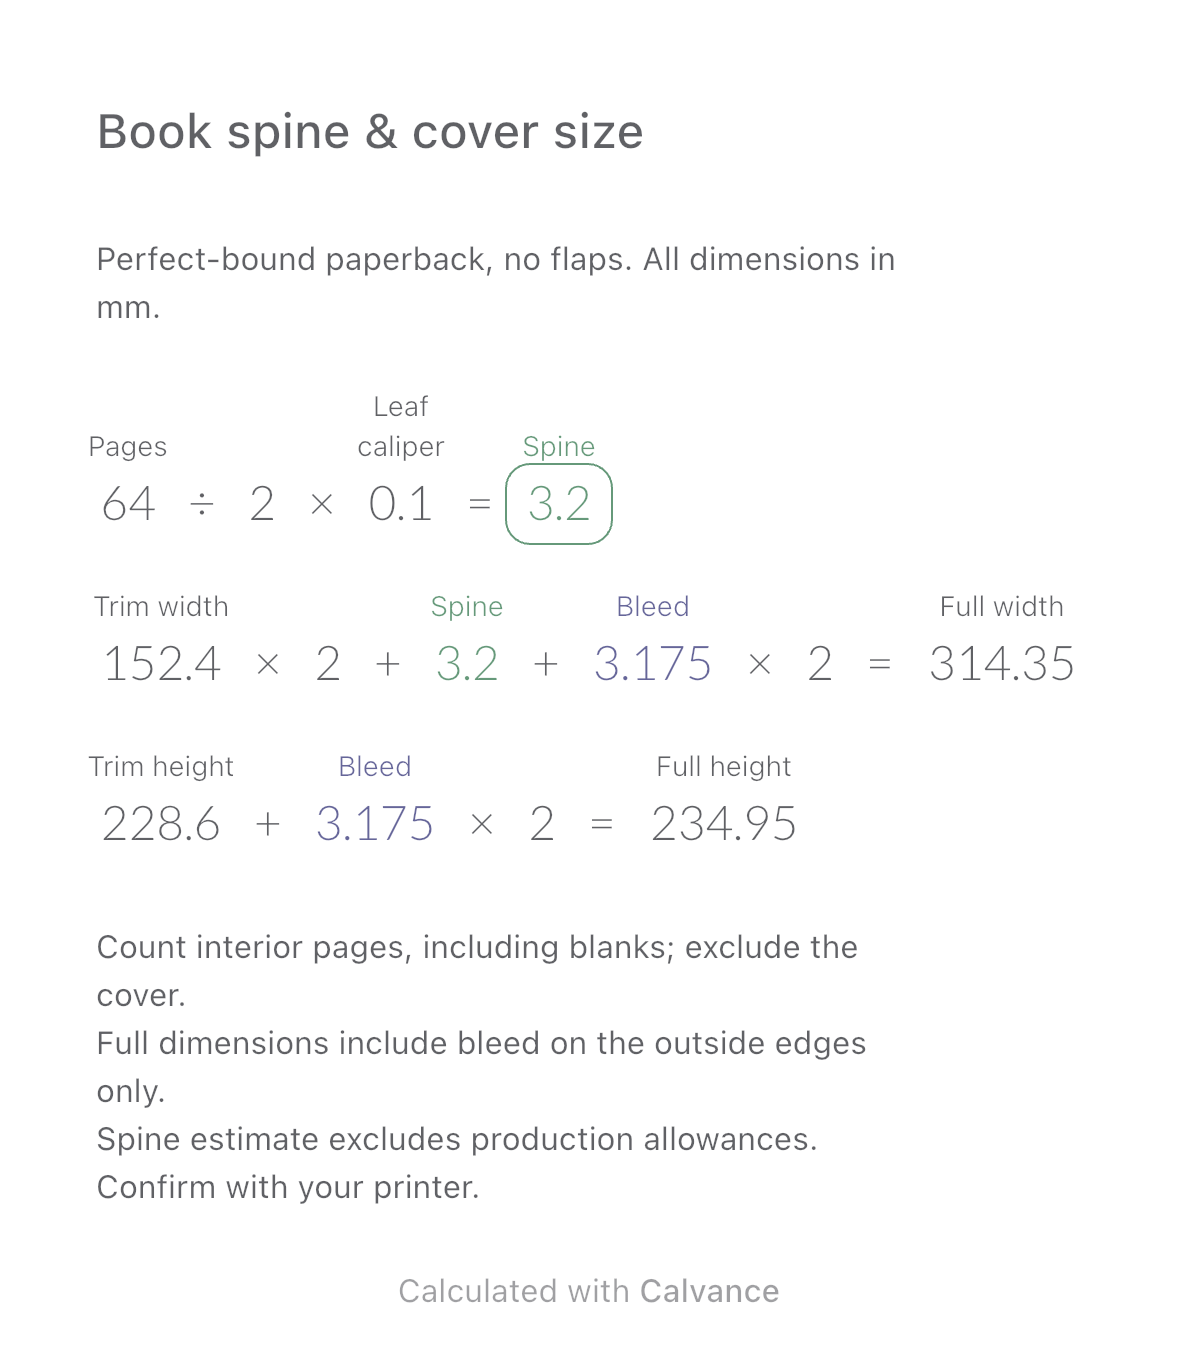
Estimate a perfect-bound book’s spine and full cover dimensions from page count, paper caliper and bleed. Compare changes and download a reusable Calvance canvas.
View template and method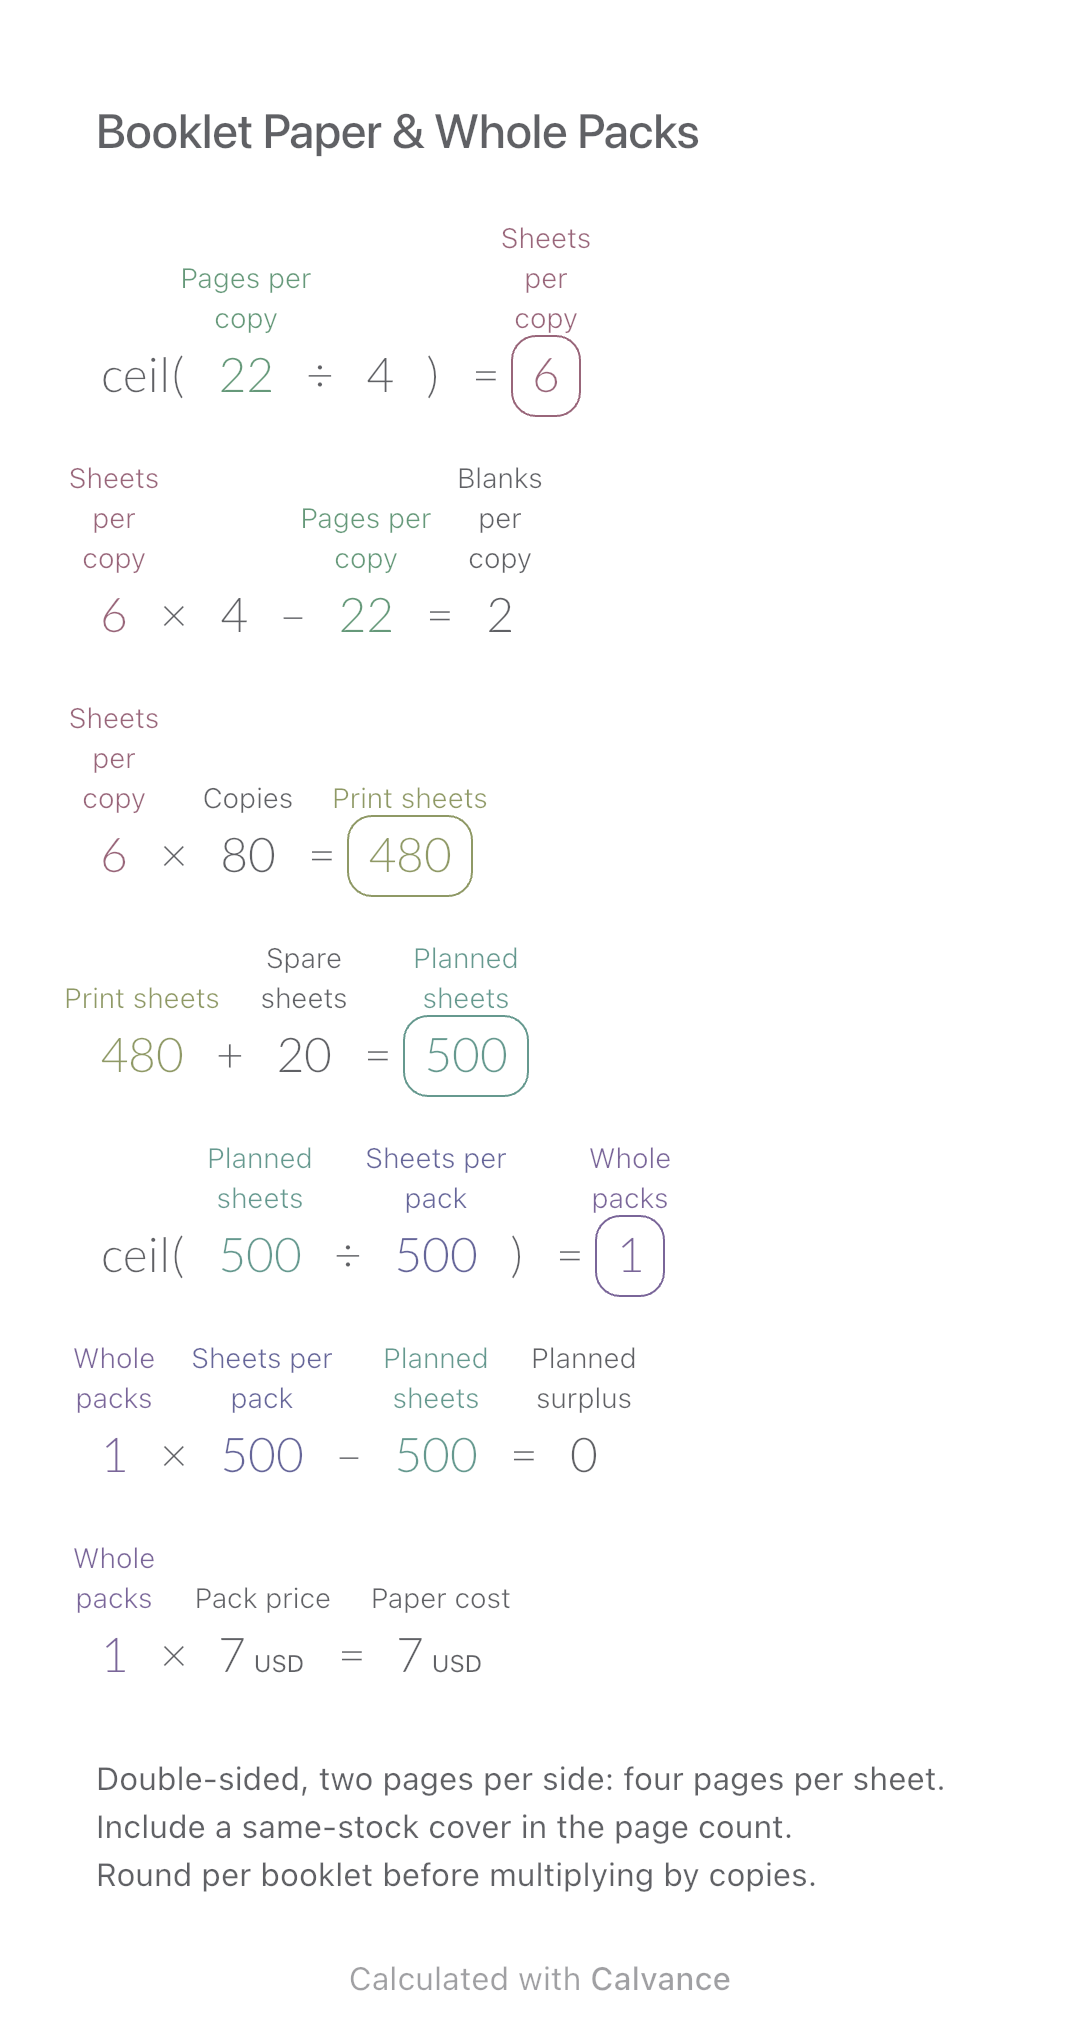
Convert booklet pages and copies into physical sheets, blank pages, whole paper packs and purchase cost.
View template and methodChoose a plan when you need more canvases, high-resolution image exports, or sync across devices.